If you love off-roading or want your Jeep Wrangler JL to look tougher, installing new fender flares is a smart upgrade. Fender flares do more than change your Jeep’s style—they also protect your bodywork from rocks, mud, and debris. Many owners install fender flares themselves, but the process can feel intimidating if you’ve never done it before.
The good news? With the right tools, preparation, and clear steps, you can install Jeep Wrangler JL fender flares at home, even if you’re not a mechanic. This guide walks you through every detail, from preparation to troubleshooting, so you can tackle the job confidently and avoid common mistakes.
Why Install Fender Flares On Your Jeep Wrangler Jl?
Fender flares are more than a visual upgrade. They serve several important functions for Jeep owners:
- Legal compliance: Many regions require fender flares if your tires stick out past the body.
- Protection: Flares shield your Jeep’s paint and underbody from road debris, rocks, and mud.
- Custom style: Fender flares come in various designs, letting you give your JL a unique look.
- Accommodate larger tires: If you run oversized tires for off-roading, wider flares prevent rubbing and keep debris in check.
Most Jeep Wrangler JL owners choose fender flares when upgrading wheels and tires, or after damaging the factory flares during off-road adventures.
Choosing The Right Fender Flares
Before you start, pick fender flares that fit your needs and style. Here are the main types you’ll see for the Wrangler JL:
Oem Vs. Aftermarket Flares
| Feature | OEM Flares | Aftermarket Flares |
|---|---|---|
| Fit | Perfect factory fit | May need adjustment |
| Style | Stock look | Wide variety (aggressive, slim, flat, etc.) |
| Material | Plastic/ABS | Plastic, steel, aluminum, etc. |
| Price | Higher | Varies (often lower) |
| Paintable | Usually not | Many options |
Aftermarket flares often provide more options for width, color, and material.
Important Factors To Consider
- Material: Most are made from ABS plastic (lightweight, flexible, and affordable), but metal flares are stronger for extreme use.
- Width: Choose flares wide enough to cover your tires. Measure tire “poke” and check local laws.
- Finish: Some come pre-painted, others are ready for custom paint.
- Bolt-on vs. Cut-out: Bolt-on flares need no body cutting. Cut-out flares may require trimming for extra clearance.
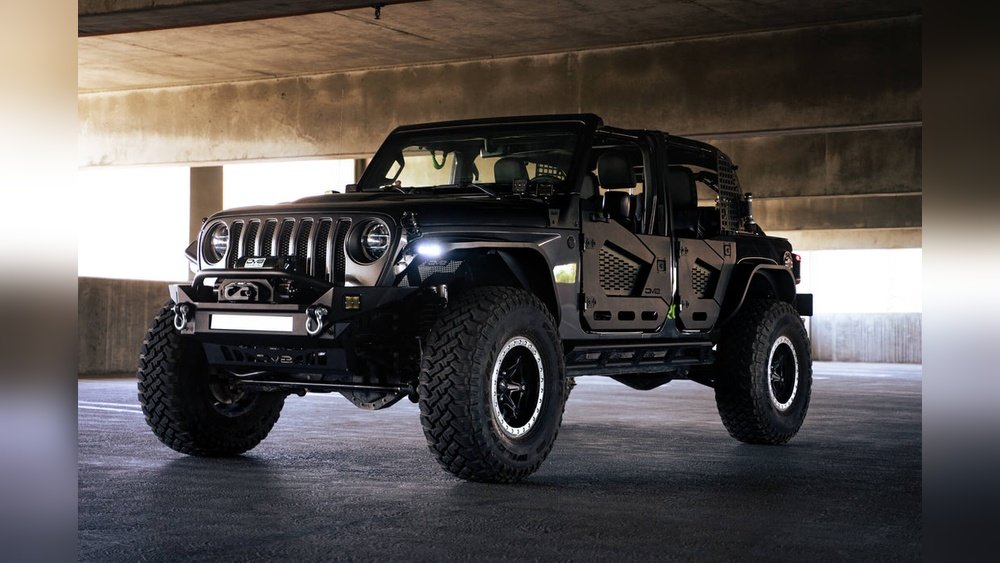
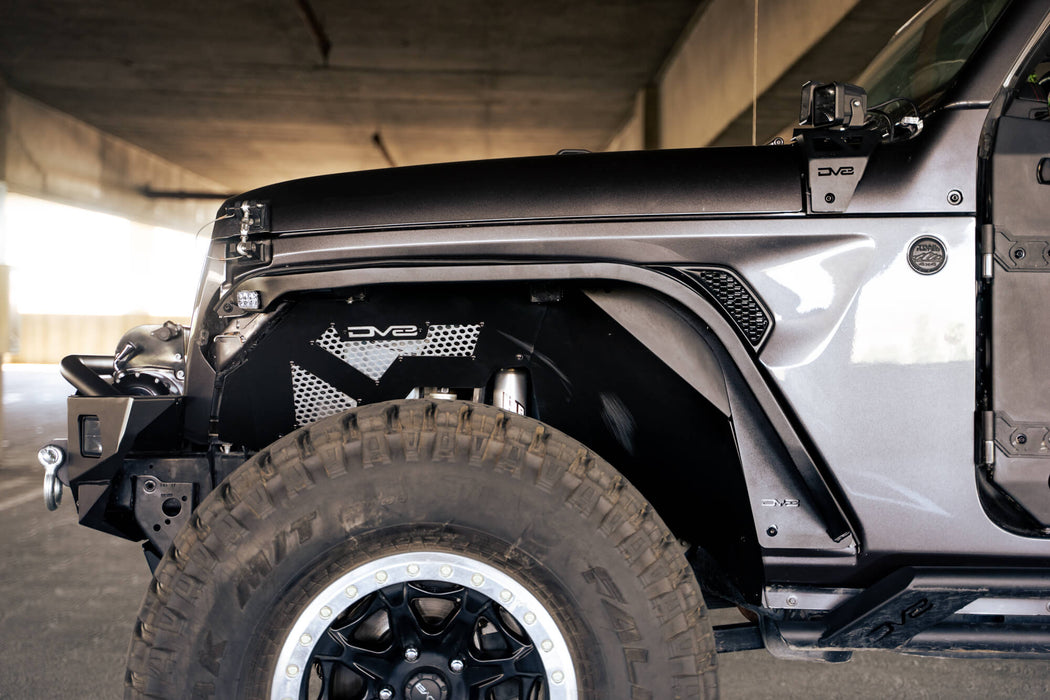
Many JL owners choose bolt-on flat flares for off-road clearance and a tough look.

Credit: www.hookeroad.com
Tools And Supplies Needed
You don’t need a full mechanic’s shop, but some basic tools are essential:
- Ratchet and socket set (10mm, 8mm, and 7mm sizes)
- Trim removal tool (plastic, to avoid scratches)
- Screwdrivers (Phillips and flathead)
- Torx bits (T30 often required)
- Pliers
- Drill (sometimes needed for aftermarket flares)
- Protective gloves
- Fender flare kit (with all hardware, gaskets, and instructions)
- Microfiber cloth
- Painter’s tape (optional, for marking holes)
- Rust inhibitor (if drilling is required)
Be sure to check your fender flare kit for any special hardware or tools.
Preparing Your Jeep Wrangler Jl
Preparation is one of the most important steps. Skipping it can cause scratches, poor fit, or even damage.
- Park on a flat, clean surface. Make sure your Jeep is stable and the parking brake is engaged.
- Clean the fender area. Wash and dry the body panels around each wheel well. Dirt can scratch the paint during removal or installation.
- Gather all tools and flares. Lay out everything before starting. Check the flare kit for missing hardware.
- Read the instructions. Every kit is a little different. Skim the included manual for any unique steps.
Pro tip: If you plan to reuse factory liner or LED lights, disconnect your battery to avoid electrical shorts.
Removing The Factory Fender Flares
Taking off the stock flares is sometimes the trickiest part. The JL’s factory flares are held by a mix of clips, bolts, and sometimes adhesive.
Step-by-step Removal
- Remove inner fender liner. Use a trim removal tool or screwdriver to pop out the plastic push-pins and screws holding the liner. Set the liner aside if you plan to reuse it.
- Locate and remove fasteners. Under the edge of the flare, remove all visible screws or bolts (usually 10mm or 8mm).
- Release the clips. Gently pull the flare outward, starting at one end. You’ll hear the clips pop loose. Use steady pressure—yanking too hard may break the flare or clips.
- Disconnect lights. If your JL has integrated LED signals, unplug the wiring harness before fully removing the flare.
- Clean the surface. Wipe down any dirt, adhesive, or residue left behind.
Non-obvious insight: Some clips are designed to break during removal. New clips are often included with aftermarket kits, but it’s smart to have extras on hand.
Test-fit Your New Fender Flares
Before you install anything permanently, always test-fit the new fender flares. This quick check prevents headaches later.
- Hold each flare in place to check alignment and coverage.
- Make sure the holes line up with the Jeep’s mounting points.
- If needed, gently tweak the flare or adjust the mounting tabs.
- For metal flares, check for contact with the body or door.
If you spot a problem, now is the time to fix it. Do not skip this step.
Installing Aftermarket Fender Flares
Most aftermarket fender flares for the Wrangler JL use a bolt-on design, but the method varies by brand and material. Below are the general steps for a smooth installation.
Step 1: Attach Rubber Gaskets
Many flares include a rubber edge trim or gasket. This piece helps seal the flare to the body and prevents paint damage.
- Slide the gasket along the inner edge of each flare.
- Trim any excess with scissors for a clean look.
- Press firmly so the gasket stays in place.
Step 2: Position The Flare
- Hold the flare up to the wheel well.
- Insert the provided bolts or screws through the flare and into the mounting holes.
- For some kits, you may need to drill small holes. Mark these with painter’s tape before drilling.
Tip: Start all bolts by hand before tightening. This lets you adjust the flare for best fit.
Step 3: Secure With Hardware
- Tighten bolts evenly, moving in a cross pattern for even pressure.
- Do not overtighten—this can crack plastic flares or strip the holes.
- If your kit includes backing plates or brackets, install them now.
Step 4: Reinstall Fender Liners (if Reusing)
- Some aftermarket flares work with factory liners. Reattach these using the original clips or new hardware.
- If the liners don’t fit, you can trim them with scissors or leave them off for maximum clearance.
Step 5: Connect Lighting (if Needed)
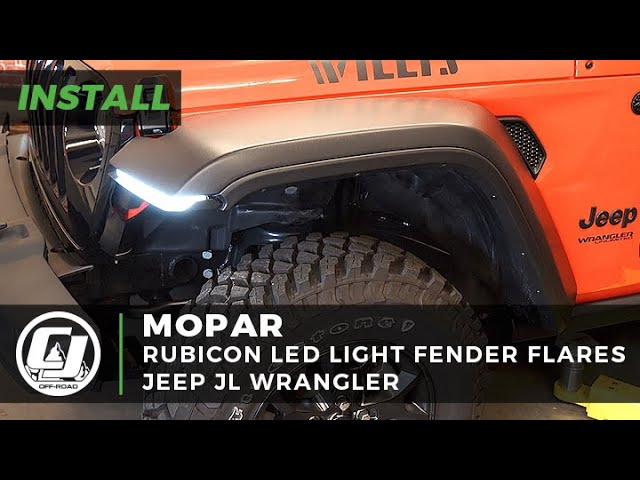
- If your flares have integrated LED signals, reconnect the wiring harness.
- Test all lights before finishing to avoid surprises later.
Non-obvious insight: Aftermarket flares sometimes use different mounting points. Double-check that all bolts go into solid metal or factory-threaded holes, not just plastic.
Front Vs. Rear Fender Flare Installation
Front and rear fender flares usually install in a similar way, but there are a few differences to watch for.
| Location | Special Steps | Common Issues |
|---|---|---|
| Front | Disconnect marker lights; more wiring | Broken clips, light error codes |
| Rear | Simpler, less wiring | Hidden bolts near bumper |
Always start with the front flares if your kit includes new lighting. This way, you can check all electrical connections before moving on.
Credit: dv8offroad.com
Checking Fitment And Making Adjustments
After installing all flares, step back and check the fit from every angle. Look for:
- Even gaps between flare and body
- Proper wheel and tire coverage
- Secure mounting (no loose spots)
- Flare alignment with doors and hood
If you find uneven gaps or rubbing, loosen the bolts and reposition as needed. It’s better to spend extra time now than redo the job later.
Finishing Touches And Clean-up
The last steps are simple but important:
- Tighten all hardware. Give each bolt a final check for snugness.
- Reinstall any trim pieces. If you removed mud flaps or badges, put them back now.
- Reconnect the battery. If you disconnected it for lighting, reconnect and test all lights.
- Clean the flares and body. Wipe away fingerprints and dust for a sharp finish.
- Test drive. Take your Jeep for a short drive to ensure nothing rattles or rubs.
Don’t forget to keep the instruction manual and any spare hardware in your glove box for future use.
Credit: www.youtube.com
Common Mistakes To Avoid
New installers often make the same errors. Here’s what to watch out for:
- Not test-fitting: Always check the flare position before drilling or bolting.
- Losing hardware: Keep all screws and clips organized during removal.
- Forgetting the gasket: Missing this step can lead to paint scratches.
- Overtightening: This cracks plastic and damages body threads.
- Skipping liner reinstallation: This leaves wiring and metal exposed.
If you hit a snag, check online Jeep forums or the manufacturer’s website for tips—many have video guides.
Maintenance Tips For Fender Flares
Once installed, fender flares need little maintenance. Here’s how to keep them looking good and working well:
- Wash regularly: Mud and salt can build up between the flare and body. Clean during each wash.
- Check hardware: Every oil change, inspect bolts for tightness.
- Treat for UV protection: Use plastic protectant on ABS flares to prevent fading.
- Inspect after off-roading: Look for cracks, deep scratches, or loosened bolts after rough use.
- Touch up paint: If you see chips around the mounting area, use touch-up paint to prevent rust.
Well-cared-for fender flares can last the life of your Jeep.
Troubleshooting: What If Something Goes Wrong?
It’s rare, but problems can happen. Here’s how to handle common issues:
- Misaligned holes: Use a round file to enlarge mounting holes slightly—don’t force bolts.
- Broken clips: Buy a Jeep JL-specific clip kit online or at a dealer.
- Wiring errors: If lights don’t work, check the wiring harness and fuses.
- Rattling flares: Add thin foam tape between the flare and body to stop noise.
If you’re stuck, check the official Jeep owner’s site for more troubleshooting steps.
Frequently Asked Questions
How Long Does It Take To Install Jeep Wrangler Jl Fender Flares?
For a first-time installer, expect 2–4 hours for all four flares. Experienced owners may finish in under two hours. Add extra time if you need to modify liners or connect wiring.
Can I Install Fender Flares Without Removing The Wheels?
You can usually install JL fender flares without removing the wheels, especially if you have small hands or a short screwdriver. For best access, especially with oversized tires, removing the wheels makes the job easier.
Will Aftermarket Flares Affect My Jeep’s Warranty?
Most aftermarket flares do not void your Jeep’s basic warranty, as they are a common upgrade. However, damage caused by improper installation may not be covered. Always check with your dealer if you’re unsure.
Do I Need To Paint My Fender Flares?
Most fender flares come in textured black plastic, which does not need paint. Some owners choose to paint them to match the body color. If you want a color match, buy “paint-ready” flares and have them professionally sprayed.
What If My State Has Specific Fender Flare Laws?
Some states require flares to cover the entire width of the tire tread. Check your local motor vehicle laws before buying. If in doubt, measure your tire “poke” and choose a flare at least that wide.
Upgrading your Jeep Wrangler JL with new fender flares transforms both its look and its protection. With careful preparation and these step-by-step instructions, you can tackle the installation yourself and enjoy off-road adventures with confidence.