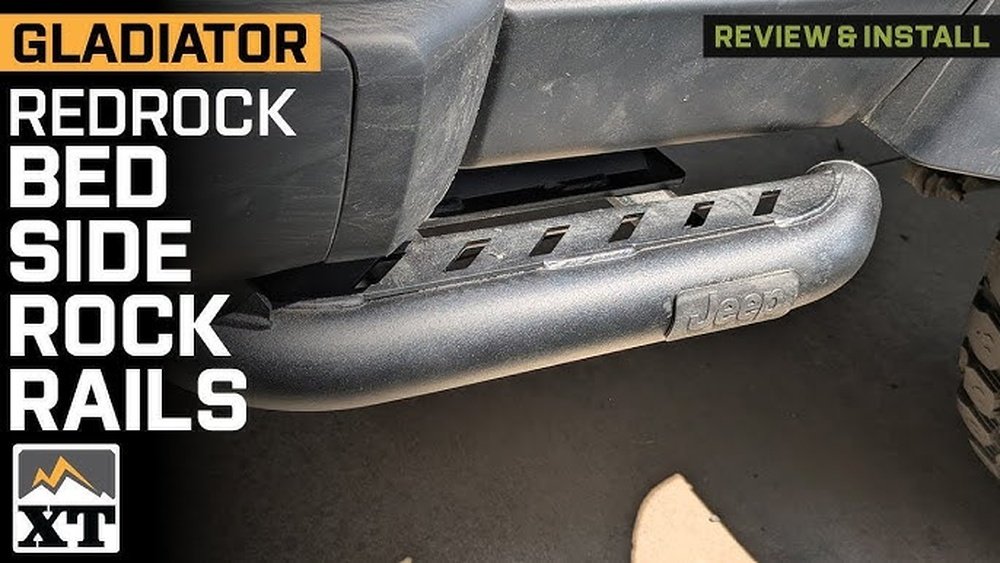
Installing rock rails on your Jeep Gladiator is one of the smartest upgrades you can make if you love off-roading or just want to protect your truck’s sides. Rock rails, sometimes called rock sliders, defend your Gladiator from rocks, tree stumps, and road debris that can dent or scratch the body. Besides protection, they also give your vehicle a rugged look and sometimes even help as a step for easier entry. This guide will walk you through every step, from preparation to installation, and help you avoid the common mistakes beginners make.
Why Install Rock Rails On A Jeep Gladiator?
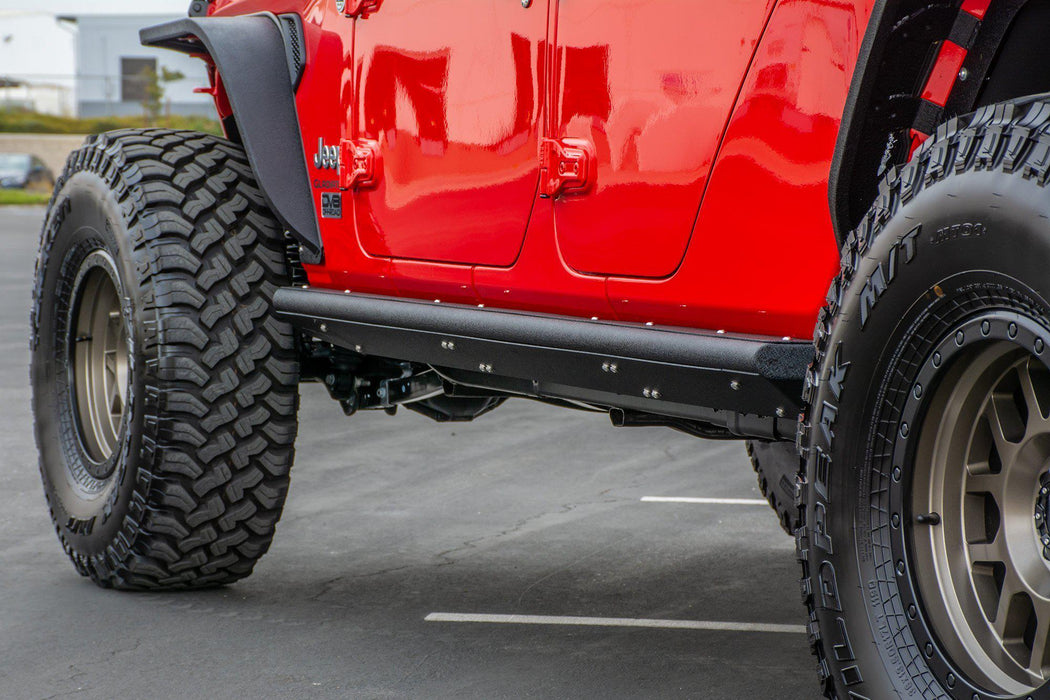
The Jeep Gladiator is built for adventure, but its long wheelbase makes it more vulnerable to hits from rocks and obstacles. The factory side steps or no steps at all often leave the lower panels exposed. With rock rails, you get an armor-like shield that sits right under your doors. They’re designed to take direct impact, supporting the Jeep’s weight if you slide over a rock. Many owners also appreciate the way rock rails make their Gladiator look tougher and more trail-ready.
Some rails are even designed to work as steps, which is especially helpful if your Jeep is lifted. The combination of protection and practical use makes rock rails a favorite among off-roaders and daily drivers alike.
Types Of Rock Rails For Gladiator
Before you start, it’s important to know the main kinds of rock rails available:
| Type | Main Purpose | Typical Material | Price Range |
|---|---|---|---|
| Factory Mopar Rails | Basic protection, OEM fit | Steel | $400-$700 |
| Aftermarket Weld-On | Maximum strength, permanent | Heavy-duty steel | $600-$1200 |
| Bolt-On Aftermarket | DIY-friendly, removable | Steel or aluminum | $300-$900 |
| Step/Rock Slider Combo | Protection + ease of entry | Steel | $500-$1000 |
Bolt-on rails are the most popular for DIY installations. They require no welding, and you can remove them later if needed. For this guide, we’ll focus on installing bolt-on rock rails.
Tools And Materials You’ll Need
Having the right tools makes the installation smooth and safe. Here’s what you’ll need:
- Socket set (metric and standard sizes)
- Torque wrench
- Ratchet and extension
- Breaker bar (for tough bolts)
- Safety glasses and gloves
- Jack and jack stands (optional, for more clearance)
- Creeper or cardboard (for comfort under the vehicle)
- Rust inhibitor spray (for added protection)
- Buddy/helper (rails can be heavy and awkward)
Non-obvious tip: Some rails use special brackets or spacers. Always check the manufacturer’s instructions and lay out every part before you begin.
Preparing For Installation
Preparation is often overlooked, but it’s key to a safe and frustration-free install.
- Park on a flat surface. Make sure your Jeep is in park, with the parking brake engaged.
- Inspect the rock rails. Check for shipping damage and compare all parts to the instruction manual.
- Clean the mounting area. Dirt or rust can cause poor fit or corrosion later. Wipe down the pinch seam and frame area.
- Remove old steps or rails. If your Gladiator has factory steps or rails, use your socket set to remove them first. Keep the hardware—you may need some bolts for the new rails.
- Test fit the rails. Hold them up to the Jeep to understand how they align and which holes they use.

Credit: rocky-road.com
Step-by-step Installation Process
Now, let’s get into the actual installation. It usually takes about 1–2 hours, depending on experience.
1. Position The Rock Rail
With a helper, lift the rail into place under your Gladiator’s body. Line up the mounting holes in the rail with the factory threaded holes or pinch seam holes. Most rails use 4-6 mounting points per side.
Experience-based insight: Sometimes the rails fit tightly. A gentle tap with a rubber mallet can help align the holes without damaging the paint.
2. Insert And Hand-tighten Bolts
Insert the supplied bolts into the mounting holes. Start with the center holes to balance the rail, then move to the front and back. Only hand-tighten at this stage; do not fully torque the bolts yet.
3. Check Alignment
Stand back and check that the rail is straight and level with the Jeep’s body. Small adjustments now will prevent problems later. If the rail sits too close or far from the body, check for leftover dirt or factory seam sealer that may need to be trimmed.
4. Torque The Bolts
Using your torque wrench, tighten each bolt to the manufacturer’s specified setting (usually around 35–40 ft-lbs). Start from the center and work outward for even pressure. Over-tightening can strip threads, while loose bolts may rattle or fail.
Non-obvious tip: Re-check the torque after driving 100 miles. Vibration can cause bolts to loosen after the first trip.
5. Repeat On The Other Side
Move to the other side and repeat the steps above. Each side may have small differences, especially if the frame holes are not perfectly clean.
6. Apply Rust Protection
Spray a light coat of rust inhibitor on the bolt heads and any exposed metal. This step is easy to forget but makes a big difference if you drive in wet or salty conditions.
7. Final Safety Check
Go over every bolt one last time, and push on the rock rails to make sure they don’t move. Check that doors open and close freely and that the rails do not rub.
Common Mistakes To Avoid
Installing rock rails is straightforward, but beginners often make these mistakes:
- Skipping the test fit: Not test-fitting the rail before bolting it can lead to alignment problems.
- Mixing up hardware: Many rails use different bolts for the frame and pinch seam. Sorting them ahead saves confusion.
- Forgetting rust spray: Exposed bolts can rust fast, especially where winter roads are salted.
- Over-tightening bolts: This can strip factory holes, especially on the pinch seam.
- Not retorquing after a test drive: Bolts can work loose, and missing this step can cost you later.

Credit: www.youtube.com
After Installation: What To Expect
With the rock rails installed, you’ll notice a difference right away. They give your Gladiator a more aggressive look and make you feel more confident on rocky trails. You’ll also notice less worry about door dings or bottom-edge scrapes.
Practical advice: The rails may slightly reduce ground clearance compared to no rails, but the protection is well worth it. Some rails also add a step, which can help shorter passengers or kids get in more easily.
If you plan to use your Jeep for tough off-roading, check the rails after each trip. Look for dents, chips, or loose bolts, and address them quickly.
Comparing Popular Gladiator Rock Rail Brands
Choosing the right brand can be overwhelming. Here’s a quick look at how three popular options stack up:
| Brand | Material | Install Difficulty | Weight (per side) | Warranty |
|---|---|---|---|---|
| Mopar OEM | Steel | Easy | 38 lbs | Limited |
| Rock-Slide Engineering | Steel/Aluminum | Moderate | 50 lbs | 3 Years |
| ACE Engineering | Steel | Easy | 40 lbs | Lifetime |
Pro tip: OEM rails are easiest for beginners, while some aftermarket brands offer extra strength or features like power steps.
Caring For Your Rock Rails
After installation, taking care of your rails helps them last. Wash them after muddy or salty trips, and touch up any paint chips with rust-resistant spray paint. Check the bolts during oil changes to make sure nothing is coming loose.
If you live in a wet climate, add a coat of wax or sealer to prevent corrosion.
If you do a lot of rock crawling, check the rails for bends or cracks after each trip. Small dents are normal, but deeper damage means it’s time for repair or replacement.
When To Upgrade Or Replace Rock Rails
Sometimes, you may want to upgrade your rock rails:
- If you bend or crack them: Severe off-road hits can damage weaker rails.
- If you want a step feature: Some brands offer drop-down steps or powered steps for easier access.
- If you change tire size or lift height: Taller lifts may need different rails for best protection and looks.
- If you notice rust or loose welds: Especially in older steel rails after years of use.
For most daily drivers, a good set of bolt-on rails will last many years. Hardcore off-roaders may need to upgrade more often.
Real-world Example
Mike, a Jeep Gladiator owner from Utah, installed ACE Engineering bolt-on rock rails. He found the install took about 90 minutes with basic tools and a friend’s help. After a trip through Moab’s rocky trails, his rails had a few scratches but protected the doors perfectly.
He checks his bolts every oil change and touches up paint as needed. Mike says the rails also help his kids get in the truck, and he’d recommend the upgrade to anyone who wants both looks and protection.
Where To Find Quality Rock Rails
Most Jeep parts retailers stock popular brands. It’s smart to shop around for deals, but make sure you’re getting real steel, not thin metal that bends easily. Look for reviews and installation videos for your specific Gladiator year.
For more detailed specs and reviews, check the official Jeep Gladiator Accessories page.
Credit: dv8offroad.com
Frequently Asked Questions
How Long Does It Take To Install Rock Rails?
Most DIY installations take about 1–2 hours per side. If you’re experienced and have a helper, it can be done even faster. Allow extra time if you need to remove old steps or clean mounting points.
Do I Need Special Tools To Install Rock Rails?
No special tools are required for most bolt-on rails. A socket set, torque wrench, and ratchet are the main tools needed. Some rails may need a breaker bar for stubborn bolts or a drill if the holes need to be cleaned.
Will Rock Rails Fit With Factory Steps?
Most rock rails replace factory steps. Some brands offer step-slider combos, but it’s rare for both to fit together. Always check compatibility before ordering.
How Much Weight Can Rock Rails Support?
Quality steel rock rails can support the weight of the Jeep if you slide off a rock or use them as a jack point. Cheaper or thinner rails may only handle light impacts, so check the manufacturer’s specs.
Can I Install Rock Rails Alone?
It’s possible, but having a helper makes it much safer and easier. Rails are heavy and awkward to hold in place while you start bolts. If you must install alone, use a floor jack or sturdy blocks to support the rail.
Installing rock rails is one of the best ways to protect your Jeep Gladiator and boost its off-road look. With careful prep, the right tools, and a little patience, you can tackle this project yourself—even if you’re not a pro mechanic.
The peace of mind and added style are well worth the effort.