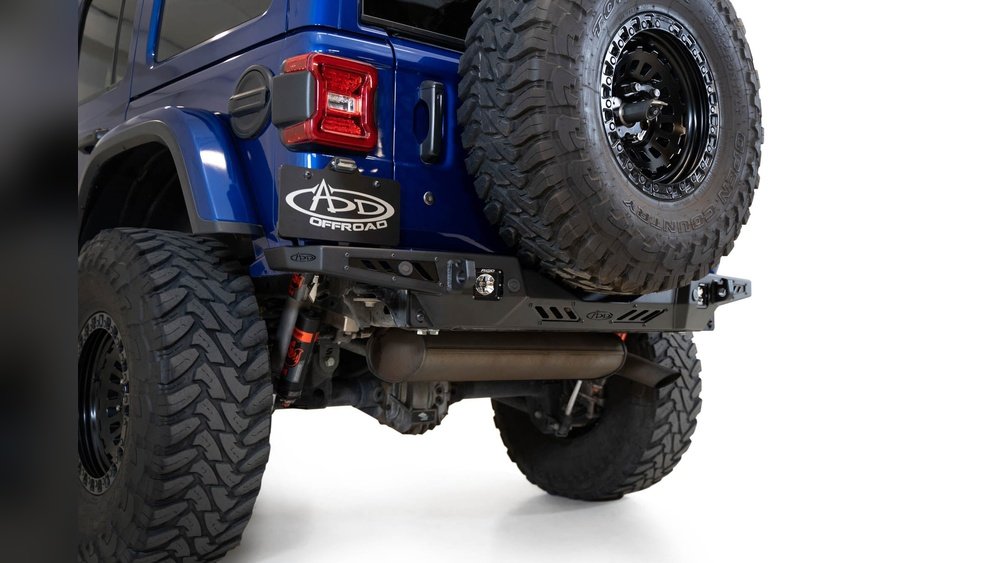
If you own a Jeep Wrangler JL, you know how important every part is to your vehicle’s look and performance. Installing a new rear bumper can boost your Jeep’s style, add extra protection, and even improve its functionality.
But how do you make sure you get it right? This guide will walk you through each step in simple terms, so you can confidently upgrade your Jeep without frustration. Keep reading, and you’ll be ready to tackle the job like a pro.
Tools And Materials Needed
Installing a rear bumper on a Jeep Wrangler JL requires specific tools and materials. Having the right items ready makes the process easier and faster. This section lists everything needed to complete the job smoothly.
Basic Hand Tools
Start with essential hand tools. A socket wrench set is crucial for loosening and tightening bolts. Include various socket sizes to match different fasteners. A torque wrench helps ensure bolts are tightened to the correct specification. Screwdrivers, both flathead and Phillips, are necessary for screws and clips.
Replacement Rear Bumper
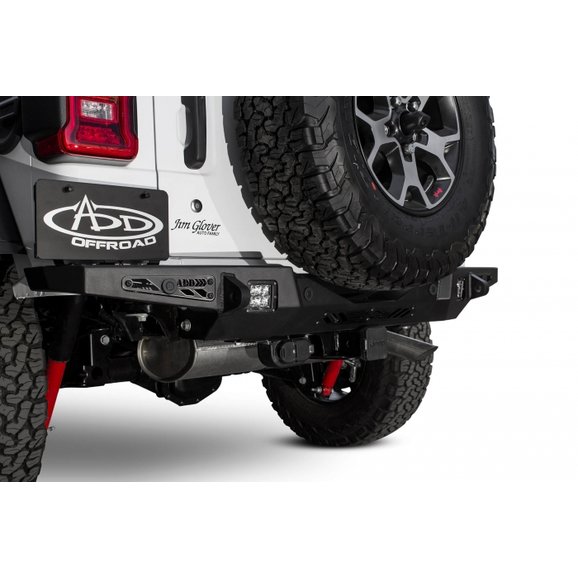
Choose a rear bumper designed for the Jeep Wrangler JL model. Ensure it fits your vehicle year and trim. Some bumpers come with built-in features like tire carriers or tow hooks. Verify the bumper includes all mounting brackets and hardware.
Mounting Hardware
Use bolts, nuts, washers, and spacers supplied with the bumper kit. If the kit lacks hardware, purchase high-grade stainless steel fasteners. These resist rust and provide strength. Keep all fasteners organized to avoid losing any during installation.
Safety Equipment
Wear safety glasses to protect your eyes from debris. Gloves prevent cuts and provide better grip. Use jack stands if you need to lift the Jeep for better access. Never rely only on a jack for support.
Additional Supplies
Lubricant spray helps loosen old, stuck bolts. Anti-seize compound prevents future rust and makes removal easier. A clean rag removes dirt and grease from mounting points. Having these supplies nearby speeds up the installation process.

Credit: www.youtube.com
Preparing The Jeep Wrangler Jl
Start by getting your Jeep Wrangler JL ready for the new rear bumper. Preparation is key. It makes the installation easier and safer. Take your time to follow each step carefully. This way, you avoid damage and ensure a perfect fit.
Proper preparation also helps save time during installation. A well-prepared vehicle creates a smooth workflow. You will feel more confident working on your Jeep. Let’s begin with securing your vehicle and removing the old bumper.
Park And Secure Vehicle
Park the Jeep on a flat surface. Turn off the engine. Engage the parking brake. This prevents the vehicle from moving.
Use wheel chocks on both front tires. This adds extra safety. Make sure the area is well-lit. Clear any tools or objects around the Jeep. A clean workspace helps avoid accidents.
Remove Existing Rear Bumper
Locate the bolts holding the rear bumper. Use the correct tools to loosen them. Keep the bolts in a safe place for reuse.
Carefully detach any electrical connectors. These may include backup sensors or lights. Gently pull the bumper away from the Jeep. Ask for help if the bumper is heavy.
Inspect the area for damage or rust. Clean the mounting points before installing the new bumper. This ensures a tight and secure fit.
Inspecting Mounting Points
Start by checking the mounting points for any damage or rust. Clean the area to ensure a secure fit for the rear bumper. Proper inspection helps avoid problems during installation.
Understanding Mounting Points
Before installing the rear bumper on your Jeep Wrangler JL, check the mounting points carefully. These points are where the bumper attaches to the frame. They must be strong and free of damage.
Look for any rust, cracks, or bends that could weaken the connection. Weak mounting points can cause the bumper to become loose or fall off during driving.
Cleaning The Mounting Areas
Remove dirt, grease, and old paint from the mounting points. Clean surfaces help bolts and nuts fit tightly. Use a wire brush or sandpaper for cleaning.
Wipe the area with a clean cloth to remove dust. A clean mounting area ensures a secure fit for your new bumper.
Checking Bolt Holes And Threads
Inspect bolt holes for any damage or wear. Make sure holes are round and not stretched out. Damaged holes can make it hard to align the bumper.
Check the threads on bolts and nuts. Replace any stripped or rusty hardware. Good threads keep the bumper firmly attached and safe.
Aligning The New Rear Bumper
Aligning the new rear bumper on your Jeep Wrangler JL is a key step. Proper alignment ensures the bumper fits well and looks good. It also keeps the bumper strong and safe during use.
Take your time to position the bumper correctly. Small adjustments make a big difference. This section guides you through the alignment process step-by-step.
Prepare The Jeep For Bumper Alignment
Park the Jeep on a flat surface. Turn off the engine and apply the parking brake. Remove any old bumper parts or debris. Clear space around the rear for easy movement.
Lift And Position The New Bumper
With help, lift the new bumper carefully. Hold it close to the mounting area. Align the bumper with the Jeep’s frame holes. Avoid forcing the bumper into place.
Check The Bumper Height And Center
Measure the bumper height on both sides. The bumper should sit evenly across the rear. Adjust left or right to center it on the Jeep. Use a level if available for accuracy.
Align Mounting Holes And Secure Bolts
Match the bumper mounting holes with the frame holes. Insert bolts by hand first for easy fitting. Tighten bolts slowly and evenly. Stop tightening to check alignment again.
Final Adjustments And Tightening
Make small shifts if the bumper looks off. Tighten all bolts firmly once aligned. Avoid over-tightening to prevent damage. Double-check that the bumper feels secure and stable.
Securing The Bumper
Securing the rear bumper on your Jeep Wrangler JL is a key step. It ensures the bumper stays firmly in place during off-road adventures and daily drives. Proper installation prevents rattling and potential damage. Follow the steps carefully to attach and tighten the bumper correctly.
Attach Bolts And Fasteners
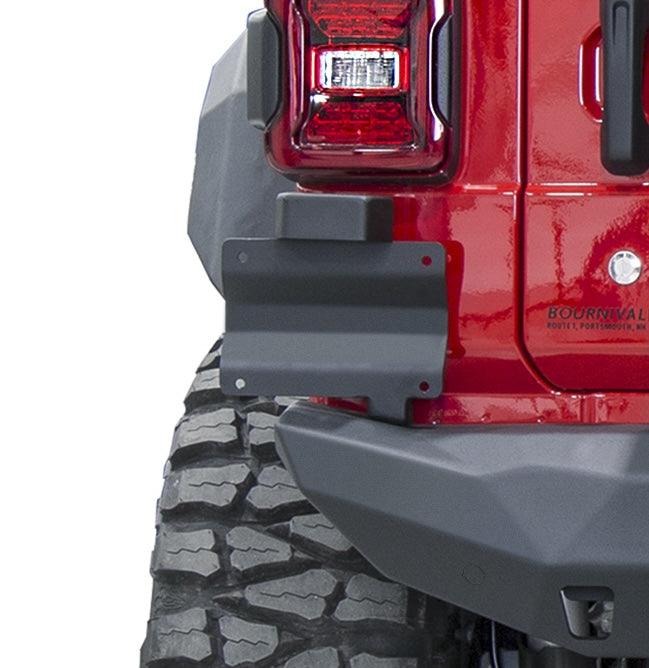
Start by aligning the bumper with the mounting points on the Jeep’s frame. Insert the bolts through the bumper and into the frame holes. Use the correct bolts provided with your bumper kit. Hand-tighten each bolt first to keep the bumper in position. Check that all fasteners line up perfectly before tightening.
Torque Specifications
Use a torque wrench to tighten all bolts to the manufacturer’s recommended settings. Proper torque avoids over-tightening, which can damage parts. It also stops bolts from coming loose during use. Refer to the Jeep Wrangler JL manual or bumper instructions for exact torque values. Tighten bolts evenly to secure the bumper firmly.
Credit: www.rival4x4usa.com
Connecting Electrical Components
Connecting the electrical components is a key step when installing the rear bumper on your Jeep Wrangler JL. These connections ensure safety features and lights work properly. Proper wiring prevents faults and keeps everything functional. Take time to check each wire and connector carefully. Use the right tools to avoid damage during the process.
Backup Sensors
Backup sensors help you park safely. Locate the sensor plugs on the bumper and the vehicle’s wiring harness. Match each sensor connector to its proper socket. Press firmly but gently to secure the connection. Use electrical tape or heat shrink tubing to protect exposed wires. Test the sensors before fully securing the bumper to confirm they work well.
License Plate Lights
License plate lights keep you legal and visible at night. Connect the light wiring from the bumper to the vehicle’s power source. Ensure the positive and negative wires match correctly. Secure the connectors to avoid loose contacts. Check the lights by turning on your Jeep’s headlights. Replace any bulbs that do not light up properly before finishing the installation.
Final Checks And Adjustments
After installing the rear bumper on your Jeep Wrangler JL, final checks and adjustments are key. These steps ensure the bumper fits well and works safely. Spend time on this stage to avoid problems later.
Check every bolt and screw for tightness. Loose parts can cause noise and reduce safety. Use a wrench to confirm all fasteners are secure. Do not overtighten to avoid damage.
Test the bumper alignment. Stand back and see if it looks straight and even. The bumper should line up with the body of the Jeep. Adjust the mounting brackets if needed to perfect the fit.
Inspect the wiring connections if your bumper has lights or sensors. Make sure all plugs fit tightly. Check that wires are not pinched or hanging loose. Secure wiring with zip ties for neatness and safety.
Check the bumper’s clearance. It should not touch tires or suspension parts. Move the steering wheel fully left and right. Watch for any rubbing or contact with the bumper.
Finally, test the bumper’s strength. Apply gentle pressure to see if it holds firm. There should be no wobbling or shifting. This step confirms the installation is solid and safe for driving.
Verify Tightness Of All Bolts
Use a torque wrench to tighten bolts to factory specs. Tight bolts keep the bumper stable and safe. Check bolts after driving a few miles to ensure they stay tight.
Align Bumper With Jeep Body
Look from different angles to check bumper alignment. Adjust brackets to fix any gaps or misalignment. A well-aligned bumper improves the Jeep’s look and function.
Inspect And Secure Electrical Connections
Examine all wiring for tight connections and no damage. Use electrical tape or heat shrink for protection. Proper wiring avoids light failure and sensor errors.
Check Clearance And Movement
Turn wheels fully to test bumper clearance. Make sure no parts touch or rub the bumper. Correct clearance prevents damage during off-road driving.
Test Bumper Stability
Push the bumper gently to check for movement. A solid bumper improves safety and durability. Fix any looseness by re-tightening or adjusting mounts.
Credit: www.quadratec.com
Frequently Asked Questions
How Do I Prepare My Jeep Wrangler Jl For Rear Bumper Installation?
Start by removing the old bumper carefully. Disconnect any electrical connections. Clean the mounting area to ensure a smooth fit for the new bumper. Gather all necessary tools and check the new bumper for completeness before starting installation.
What Tools Are Needed For Jeep Wrangler Jl Rear Bumper Installation?
You will typically need a socket wrench set, screwdrivers, and possibly a torque wrench. Some installations may require a trim removal tool. Always refer to the bumper’s instructions for specific tool requirements to ensure a proper and safe fit.
How Long Does It Take To Install A Rear Bumper On Jeep Wrangler Jl?
The installation usually takes between 1 to 2 hours. This depends on your experience and the bumper type. Taking time ensures proper alignment and secure mounting, which is crucial for safety and durability.
Can I Install A Rear Bumper On Jeep Wrangler Jl Myself?
Yes, with basic mechanical skills and the right tools, you can install it yourself. Follow the manufacturer’s instructions carefully. If unsure, seek professional help to avoid damage or safety issues.
Conclusion
Installing the rear bumper on your Jeep Wrangler JL is simpler than it seems. Follow each step carefully and take your time. Use the right tools to avoid damage and ensure safety. Double-check all bolts and connections before finishing. This upgrade adds protection and style to your Jeep.
Enjoy your improved ride with confidence and pride. Keep your Jeep ready for any adventure ahead.