If you own a Jeep Wrangler, you know it’s built for adventure. But to take your off-road game to the next level, installing body armor is a must.
It’s not just about looks — body armor protects your Jeep from rocks, debris, and rough trails. Wondering how to install it yourself without spending a fortune or hiring a pro? You’re in the right place. This guide will walk you through every step, making the process simple and stress-free.
By the end, your Jeep will be tougher, more durable, and ready for any challenge. Let’s get started!
Selecting The Right Body Armor
Selecting the right body armor for your Jeep Wrangler is key for protection and style. The right armor adds strength without adding too much weight. It also fits well, so installation is easier. Knowing what to choose helps you get the best results.
Types Of Body Armor For Jeep Wrangler
There are many types of body armor for Jeep Wranglers. Rock sliders protect the sides from rocks and bumps. Fender flares guard the wheels and body from mud and debris. Bumpers add extra protection to the front and rear. Each type has a specific use and look.
Material Considerations
Body armor usually comes in steel or aluminum. Steel is strong and lasts long but is heavier. Aluminum is lighter and resists rust but may not be as tough. Choose a material that fits your driving style and climate. Powder-coated finishes can protect the armor from rust.
Compatibility With Jeep Models
Not all body armor fits every Jeep Wrangler model. Check your Jeep’s year and model before buying. Some armor is made for specific trims or editions. Proper fit ensures safety and makes installation easier. Always confirm compatibility with the seller or manufacturer.
Tools And Equipment Needed
Installing body armor on your Jeep Wrangler needs the right tools. This section lists all tools and equipment for a smooth installation. Having these ready saves time and effort. It also helps avoid damage to your vehicle or the armor itself.
Basic Hand Tools
Start with basic hand tools. A socket wrench set is essential. It helps tighten and loosen bolts quickly. Screwdrivers, both flathead and Phillips, are needed for screws. A rubber mallet can assist in positioning armor parts without scratching. Adjustable wrenches work well for different bolt sizes. Keep a set of pliers handy for gripping and bending tasks.
Specialized Installation Tools
Some parts require specialized tools. A torque wrench ensures bolts are tightened to the correct level. This prevents over-tightening or loosening. Drill with metal bits may be necessary for custom fitting. Rivet guns might be needed for some armor panels. Using these tools makes the armor more secure and durable.
Safety Gear
Wear safety gear to protect yourself. Safety glasses shield your eyes from flying debris. Work gloves protect your hands from sharp edges. Knee pads provide comfort when working low on the Jeep. Hearing protection might be needed when using power tools. Safety gear keeps the installation safe and comfortable.
Preparing The Jeep Wrangler
Preparing your Jeep Wrangler is the first step to install body armor. This process makes sure the parts fit well and stay strong. Taking time to prepare helps avoid problems during installation. Clean and check the vehicle carefully for a smooth setup.
Cleaning And Inspecting Mounting Areas
Start by cleaning the mounting areas with soap and water. Remove dirt, grease, and old residue. Use a brush to reach tight spots. After cleaning, dry the areas completely. Check for any scratches or dents that might affect the armor fit.
Removing Existing Accessories
Take off any accessories or parts where the armor will go. This includes steps, guards, or brackets. Use the right tools to avoid damage. Keep bolts and screws safe for later use. Clearing the space helps the armor sit properly on the Jeep.
Checking For Damage Or Rust
Look closely for rust spots or damaged metal. Rust can weaken the mounting points and cause failure. Use sandpaper or a wire brush to remove small rust patches. Bigger damage may need professional repair. Fixing these problems now ensures a strong and safe armor setup.
Credit: www.extremeterrain.com
Installing Rock Sliders
Installing rock sliders on your Jeep Wrangler boosts protection during off-road adventures. These sturdy bars guard your vehicle’s sides against rocks and rough terrain. Proper installation ensures they work well and last long. Follow clear steps to fit them securely and safely.
Positioning And Aligning
Start by placing the rock sliders next to your Jeep’s frame. Align them carefully along the side panels. Make sure they sit flush and cover the areas prone to damage. Check that the ends match the mounting points on the frame. Proper alignment prevents stress on the sliders and your Jeep’s body.
Drilling And Mounting
Mark the drilling spots on the frame through the slider’s mounting holes. Use a drill with the right size bit for clean holes. Drill slowly to avoid damaging the frame or paint. Remove any metal shavings to keep the area clean. Position the sliders back and prepare for mounting bolts.
Securing Bolts And Fasteners
Insert bolts through the sliders and frame holes. Hand-tighten each bolt to hold sliders in place. Use a torque wrench to tighten bolts to the recommended settings. Tight bolts stop movement and ensure safety. Double-check each fastener before driving your Jeep off-road.
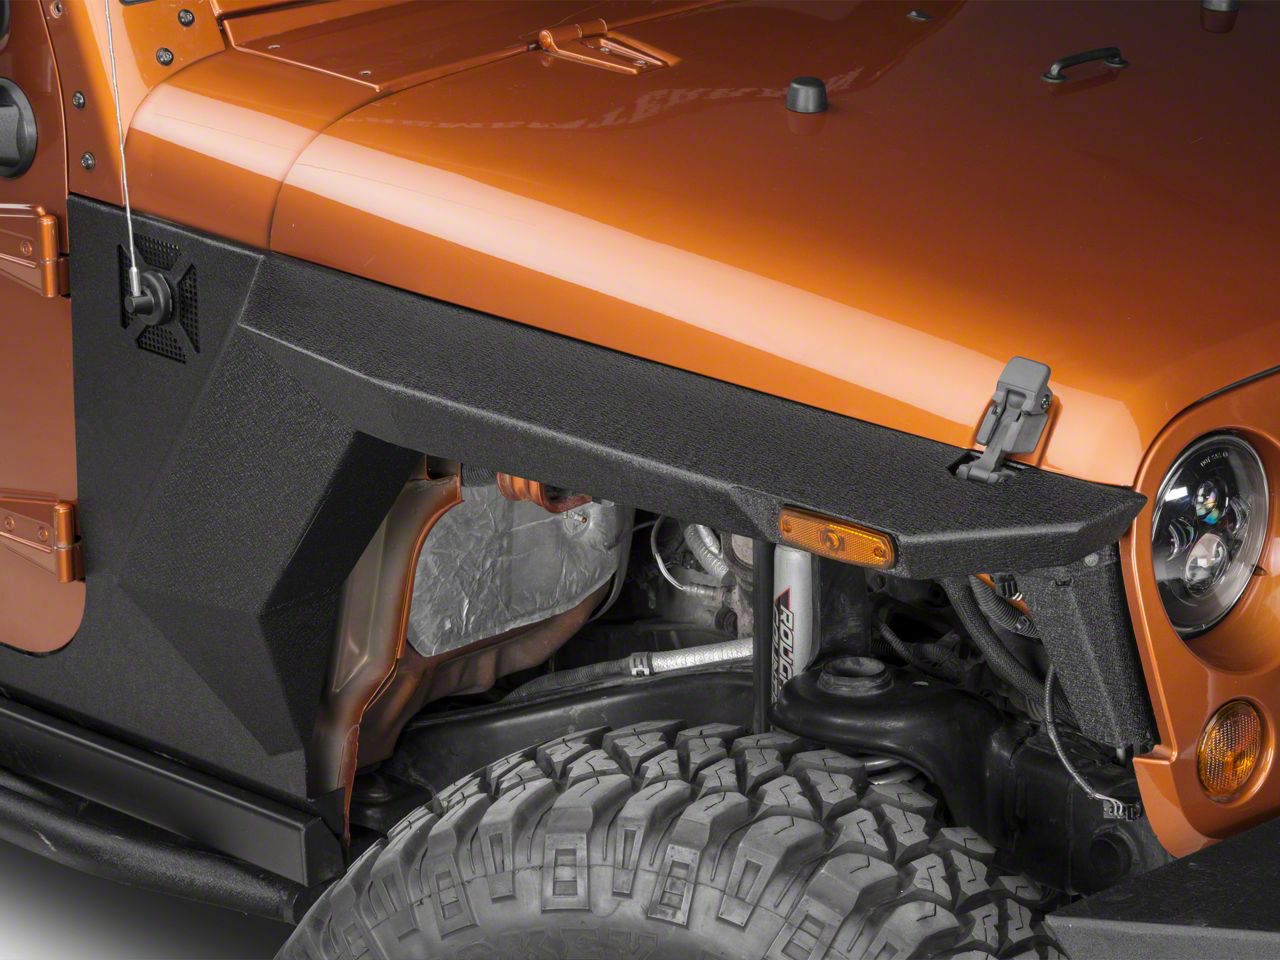
Mounting Fender Flares
Mounting fender flares on your Jeep Wrangler adds both protection and style. These flares guard your vehicle from mud, rocks, and debris. Installing new armor fender flares requires careful steps to ensure a perfect fit and strong hold.
Removing Old Flares
Start by cleaning the area around the fender flares. Use a screwdriver or socket wrench to remove screws or bolts. Some flares might have clips or adhesive that need gentle prying. Take your time to avoid damaging the paint or body. Keep the hardware in a safe place for reuse or disposal.
Fitting New Armor Flares
Test fit the new armor flares before final installation. Align the flare with the wheel well and check all holes. Adjust the position so it sits flush against the body. Use the original mounting points for easy installation. Make sure the flares cover tires properly to meet legal requirements.
Sealing And Securing
Apply a rubber or foam seal strip along the edge of the flare. This prevents water and dirt from getting under the flare. Secure the flare using screws, bolts, or clips provided. Tighten all fasteners evenly to avoid gaps or loose parts. Clean the area again to remove fingerprints and debris.

Credit: forsete.org
Adding Front And Rear Bumpers
Adding front and rear bumpers is a key step in installing body armor on your Jeep Wrangler. These bumpers protect your vehicle from impacts and give it a rugged look. The process requires careful removal of stock bumpers, proper alignment of new armor bumpers, and installing wiring for lights or accessories. Follow these steps to ensure a secure and stylish upgrade.
Removing Stock Bumpers
Start by parking your Jeep on a flat surface. Use basic tools like wrenches and screwdrivers to remove bolts. Detach any wiring connected to the bumper lights. Keep all bolts and screws safe for reuse or disposal. Remove the stock bumpers slowly to avoid damage to your Jeep.
Aligning Body Armor Bumpers
Place the new front bumper close to the mounting points. Check if the holes match the frame of your Jeep. Tighten the bolts lightly to allow adjustments. Use a level to make sure the bumper sits straight. Once aligned perfectly, tighten all bolts firmly to secure the bumper. Repeat the same steps for the rear bumper.
Wiring And Accessory Installation
Connect the wiring harness to the bumper lights carefully. Match the wires by color to avoid mistakes. Use electrical tape or connectors to secure connections. Test the lights before finalizing installation. Add any extra accessories like winches or sensors now. Ensure all wiring is hidden and protected from damage.
Installing Rock Sliders And Side Steps
Installing rock sliders and side steps on your Jeep Wrangler boosts protection and convenience. These parts shield your vehicle’s sides from rocks and rough trails. They also offer a sturdy step for easier entry and exit. Proper installation ensures durability and safety during off-road adventures.
Bracket Placement
Start by locating the mounting points on the Jeep’s frame. Align the brackets with these points carefully. Use the factory holes to position each bracket. Check that brackets sit flush against the frame. This ensures a strong and stable fit.
Bolt Tightening Sequence
Insert bolts loosely at first to allow some movement. Tighten bolts in a crisscross pattern to spread pressure evenly. Avoid fully tightening one bolt before the others. Follow the manufacturer’s torque specifications for best results. This process prevents misalignment and keeps the sliders secure.
Final Adjustments
Check the position of the sliders and side steps. Adjust them so they are level and even on both sides. Confirm all bolts are tight and secure. Test the steps by applying weight to ensure stability. Make small tweaks as needed for the best fit.
Testing And Final Checks
After installing body armor on your Jeep Wrangler, testing and final checks are crucial. This step ensures your armor fits well and does not cause issues. It helps keep your Jeep safe and ready for any adventure.
Ensuring Secure Fitment
Check all bolts and fasteners. Tighten them firmly but avoid over-tightening. Give the armor a gentle shake. It should not move or rattle. Use a torque wrench if possible. This tool ensures correct tightness. Secure fitment prevents damage during drives.
Inspecting For Interference
Look for parts touching the armor. Check doors, hood, and suspension areas. Make sure no wires or hoses are pinched. Open and close doors and hood slowly. Watch for any rubbing or catching. Clear any obstacles for smooth operation.
Road And Off-road Testing
Start with a short drive on smooth roads. Listen for unusual noises from the armor. Check the vehicle’s handling and steering. Next, try slow off-road trails. Watch how the armor performs on bumps. Stop and inspect the armor after testing. Confirm no loose parts or damage.
Maintenance Tips
Maintaining body armor on your Jeep Wrangler helps keep it strong and looking good. Regular care stops damage and extends the armor’s life. Follow these simple tips to keep your Jeep protected and ready for the road or trail.
Cleaning Body Armor
Use mild soap and water to clean the armor. Avoid harsh chemicals that can damage the finish. A soft brush helps remove dirt from tough spots. Rinse well and dry with a clean cloth to stop rust.
Regular Inspection
Look closely at your armor every few weeks. Check for scratches, dents, or loose bolts. Tighten bolts as needed to keep the armor secure. Early spotting of problems prevents bigger repairs later.
Touch-up And Repairs
Use touch-up paint to fix small scratches quickly. For bigger dents or cracks, visit a professional. Fix damage fast to keep rust and corrosion away. Proper repairs keep your armor strong and reliable.

Credit: rms-company.ru
Frequently Asked Questions
How Do I Prepare My Jeep Wrangler For Body Armor Installation?
Start by cleaning the surface where the armor will attach. Remove dirt and rust for better adhesion. Gather all necessary tools and hardware before beginning the installation process.
What Tools Are Needed To Install Body Armor On A Jeep?
You typically need a wrench set, screwdrivers, drill, and torque wrench. Having these tools ready ensures a smooth and secure installation. Check the armor kit for any specific tools required.
How Long Does It Take To Install Body Armor On A Jeep?
Installation time varies but generally takes 2 to 4 hours. It depends on your experience and the type of armor being installed. Following instructions carefully helps speed up the process.
Can I Install Body Armor On My Jeep Wrangler Myself?
Yes, with basic mechanical skills and the right tools, you can install it yourself. Follow the manufacturer’s instructions carefully for safety and proper fit. If unsure, seek professional help.
Conclusion
Installing body armor on your Jeep Wrangler protects it well. Follow the steps carefully and take your time. Use the right tools for a secure fit. Check each part to avoid loose areas. This upgrade adds strength and style to your vehicle.
Enjoy driving with added confidence and safety. Keep your Jeep ready for any adventure ahead. Simple steps make the process easy and rewarding. Your Jeep will look tough and stay safe on rough trails.