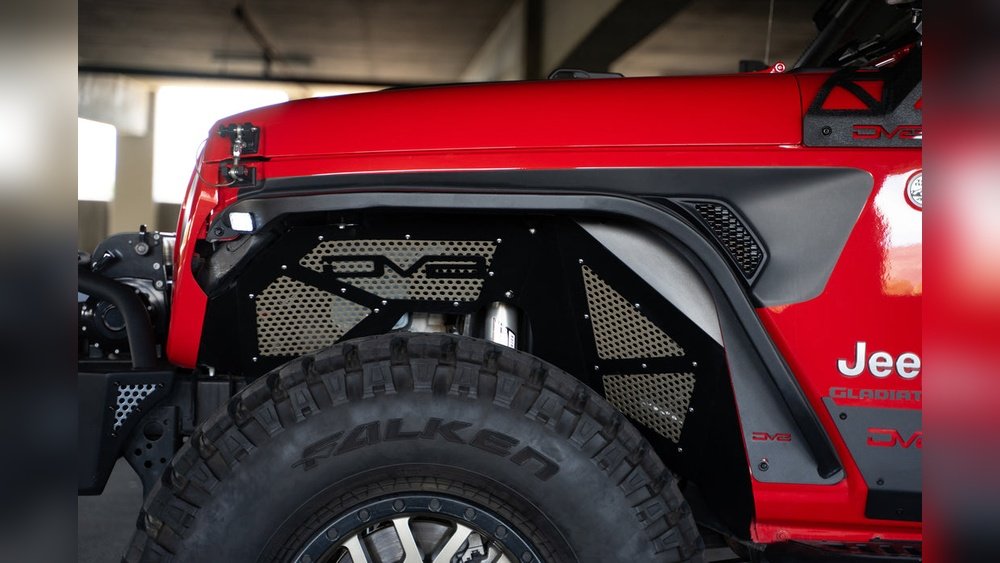
If you love adventure and style, installing fender flares on your Jeep Gladiator is a great upgrade. Fender flares not only make your truck look tougher, but they also protect it from rocks, mud, and road debris. Many Jeep owners choose to add these for off-roading, or just for that bold, custom look. The good news? You can install fender flares at home, even if you’re not a mechanic. This guide will show you how, step by step, with tips and insights to make the process easier and more successful.
Why Install Fender Flares On A Jeep Gladiator?
Fender flares are more than just a visual upgrade. They have practical benefits that many people overlook. For example, wider tires often kick up stones that can chip paint or crack windows. Flares act like shields, catching debris before it causes damage. They also keep mud off your doors and windows, which is especially useful if you drive on trails or dirt roads.
You might also need fender flares to stay legal. In some states, laws require tires to be covered by flares. This prevents rocks from flying into other cars. If your Gladiator has aftermarket tires that stick out, check your local rules.
A less obvious benefit: flares can hide rust or dents around the wheel wells. If your Jeep has been through rough conditions, this is a handy way to cover up imperfections without a full repair.
What To Know Before You Start
Installing fender flares isn’t hard, but it does take patience and the right tools. Here are some things to think about before you begin:
- Compatibility: Not all fender flares fit every Gladiator model. Check the year and trim of your Jeep and the product description carefully.
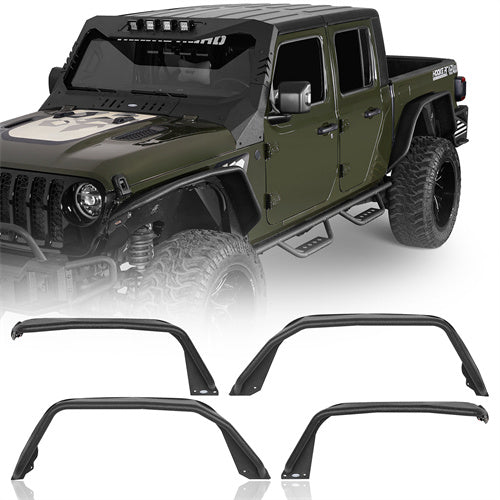
- Material: Flares are usually made from ABS plastic, fiberglass, or metal. Plastic is easiest to handle for DIY installs.
- Finish: Some flares come painted, others are raw plastic or primered. If you want to match your Jeep’s color, you might need to paint them first.
- Drilling: Most modern fender flares use factory holes, so you won’t need to drill. But some brands or custom styles may require extra holes.
- Tools: Having the right tools ready can save you a lot of frustration.
Here’s a quick look at the main types:
| Type | Main Benefit | Difficulty Level |
|---|---|---|
| Factory-Style | OEM look, easy fit | Easy |
| Pocket/Bolt-On | Rugged appearance | Moderate |
| Flat/Tube | Maximum clearance | Moderate to Hard |
For beginners, factory-style and most pocket flares are the easiest to install.

Credit: www.youtube.com
Tools And Materials You’ll Need
Before you start, gather all your tools. Missing just one can slow you down. Here’s what you’ll usually need:
- Socket set (metric and standard)
- Ratchet and extension
- Flat and Phillips screwdrivers
- Trim removal tool (plastic)
- Allen wrench set
- Torx bits (for Jeep factory bolts)
- Clean rags
- Isopropyl alcohol or mild cleaner
- Painter’s tape (optional)
- Drill and bits (only for some flares)
- Fender flares and included hardware
Most kits include all the mounting hardware and a set of instructions. Always read these instructions first, as your kit may have unique steps.
How To Remove The Stock Fender Flares
Before installing new flares, you’ll need to take off the old ones. This is usually the messiest part, since dirt and sand often collect behind the flares. Here’s how to do it:
- Clean the area: Wash around the wheel wells. This prevents scratching the paint when you remove the flares.
- Remove fasteners: Use the trim tool or screwdriver to take out all clips and screws. Jeep often uses plastic push pins. Save them in case you need them later.
- Unclip the flare: Gently pull the flare away from the body. Work slowly to avoid breaking any mounting tabs.
- Disconnect marker lights: If your flares have marker lights, unplug the wiring before pulling the flare off completely.
- Clean again: Wipe down the area. This removes any dust that could get trapped under the new flares.
Pro Tip
Some fender clips are hidden and can snap if forced. If you’re unsure, check a YouTube video for your exact Gladiator model. This will save you time and frustration.
Preparing The New Fender Flares
This is the step most beginners rush, but good preparation makes for a neater, longer-lasting install.
- Check the fit: Hold each new flare up to your Jeep to make sure the holes line up.
- Pre-assemble hardware: Some kits require you to install bolts or rubber trim before mounting. Do this at a workbench or table.
- Paint if needed: If your flares need paint, do it before installation. Allow plenty of drying time.
- Apply edge trim: Many flares come with rubber edge trim. This helps protect your paint and makes the flares look more finished. Start at one end and work slowly around the edge.
- Test fit with the trim: Once the trim is on, hold the flare up again to make sure nothing blocks the mounting points.
Step-by-step: Installing Fender Flares On Your Jeep Gladiator
Now for the fun part. Most fender flare kits are designed for “no-drill” installation, especially for newer Gladiator models. Here’s a typical process:
- Align the flare: Start with the front fender. Hold the flare in place and check that all holes line up.
- Insert hardware: Loosely install the included screws or bolts. Do not fully tighten yet.
- Work around the flare: Add all fasteners, moving from one end to the other. If the flare seems tight, gently adjust its position before tightening.
- Tighten everything: Once all hardware is in, tighten each screw or bolt. Do not overtighten—this can crack the plastic.
- Reconnect marker lights: Plug in any wiring you disconnected earlier.
- Repeat for all wheels: Move to the rear fenders and repeat the process.
- Check alignment: Stand back and make sure the flares are even and symmetrical.
Here’s a quick comparison of average install times:
| Flare Type | Front (per side) | Rear (per side) | Total Time (all 4) |
|---|---|---|---|
| Factory-Style | 25 min | 25 min | 1.5-2 hrs |
| Pocket/Bolt-On | 35 min | 35 min | 2-2.5 hrs |
| Flat/Tube | 45 min | 45 min | 3-4 hrs |
Common Mistakes To Avoid
Even if you’re handy, there are a few mistakes many Jeep owners make the first time they install fender flares:
- Skipping the test fit: Always check the flare on your Jeep before installing hardware or painting.
- Forgetting edge trim: This little piece makes a big difference in fit and protects your paint.
- Using power tools to tighten: Over-tightening with a drill or impact driver can crack or warp plastic flares.
- Not cleaning the area: Dirt left behind can cause rust or poor adhesion.
- Ignoring marker lights: Some states require fender marker lights to work. Make sure to reconnect any wiring.
Tips For A Perfect Install
If you want your Gladiator to look like it rolled out of a custom shop, these tips will help:
- Work in good light so you can see alignment clearly.
- Ask a friend for help; holding a flare in place and starting screws is much easier with two people.
- Use painter’s tape to protect your paint while test fitting.
- Double-check all bolts after driving 100 miles; some may loosen as the plastic settles.
- Store your stock flares in a safe place. If you ever sell your Jeep, the next owner might want them.
Credit: www.hookeroad.com
After Installation: Care And Maintenance
Once your new fender flares are on, there’s not much you need to do, but a little care will keep them looking good for years.
- Wash regularly: Mud and sand can scratch the plastic or dull the finish.
- Check hardware: Every few months, make sure screws are tight and flares are secure.
- Protect from sun: If your flares are unpainted, use a UV protectant to prevent fading.
- Touch up paint: If you notice chips or scratches, use touch-up paint to cover them and prevent rust.
Some Jeep owners also add clear film under the flare edges to protect the paint even more. This is a small detail that can help keep your Gladiator’s body looking new.
Real-world Example
Let’s say you bought Bushwacker pocket-style flares for your 2022 Jeep Gladiator Mojave. You notice the holes line up well, but the flare feels tight near the bottom edge. Don’t force it—loosen the other screws, adjust the flare, then retighten. Many beginners try to force the fit, which can lead to cracked plastic. Take your time, and the result will look professional.
Credit: dv8offroad.com
Cost And Value Comparison
Wondering if you should install flares yourself or pay a shop? Here’s a basic cost breakdown:
| Option | Parts Cost | Labor Cost | Total Cost |
|---|---|---|---|
| DIY Install | $200–$600 | $0 | $200–$600 |
| Professional Shop | $200–$600 | $150–$400 | $350–$1,000 |
DIY saves you money, and you get the pride of doing it yourself. Just remember, if you’re not confident, a shop can do the job quickly.
Non-obvious Insights
Two things beginners often miss: First, Jeep fender flares often hide factory seam sealer or rough welds. If you remove your flares, don’t be surprised if you see uneven surfaces. Second, if your Gladiator has sensors in the fenders (like for blind spot detection), be careful not to damage the wiring during removal or installation.
Where To Find More Help
If you get stuck, there are many resources online. Forums like the Jeep Gladiator Forum have step-by-step threads and photos from other owners. You can also find video tutorials on YouTube for almost every flare type. If you want to see official installation guides or check for recalls, visit the Mopar official site.
Upgrading your Jeep Gladiator with new fender flares is one of the most satisfying DIY projects. It adds both style and protection, and you can complete it in an afternoon with basic tools. Take your time, follow the steps, and you’ll enjoy your new look for years to come.
Frequently Asked Questions
How Long Does It Take To Install Fender Flares On A Jeep Gladiator?
For most DIYers, installing fender flares takes about 1.5 to 3 hours depending on your experience and the type of flares. Factory-style models are usually fastest, while flat or tube styles can take longer.
Do I Need To Drill New Holes In My Jeep Gladiator?
Most modern fender flares are designed to use factory mounting holes, so drilling is not necessary. However, some custom or heavy-duty flares may require extra holes. Always check your kit’s instructions.
Will Fender Flares Affect My Jeep’s Warranty?
In most cases, adding fender flares will not affect your warranty. But if you damage the body or wiring during installation, that might not be covered. It’s a good idea to keep your original parts in case you need to reverse the upgrade.
Can I Paint My Fender Flares To Match My Gladiator?
Yes, most flares can be painted. If you want a perfect match, have them painted by a professional or use a color-matched spray. Paint before installing to avoid mess and get better coverage.
What Should I Do If My New Flares Don’t Fit Perfectly?
If your flares don’t fit, double-check that you have the right model for your Gladiator’s year and trim. Try loosening all bolts, adjusting the flare, and then retightening. If the problem continues, contact the manufacturer—sometimes kits are missing hardware or have defects.
Adding fender flares is a smart move for any Jeep Gladiator owner who loves both style and function. With the right preparation and careful installation, you’ll be ready for any adventure, on or off the road.