Changing the brake pads on a Jeep Wrangler is a smart way to keep your vehicle safe and running well. Many owners choose to do this themselves, not just to save money, but to understand their Jeep better. Whether you drive your Wrangler off-road or just on city roads, good brake pads are essential. Replacing them is not as hard as it sounds, but you do need the right steps, tools, and a bit of patience. If you’ve never done this before, don’t worry—this guide will walk you through everything, step by step.
You’ll also learn some practical tips to avoid common mistakes and understand what makes Jeep Wrangler brakes different from other vehicles. By the end, you’ll be able to change your brake pads safely, confidently, and avoid costly errors. Let’s get started.
Tools And Materials Needed
Before you begin, gather all the necessary tools and materials. Missing tools can slow you down or cause frustration during the process.
- New brake pads (make sure they fit your Jeep Wrangler’s year and model)
- Socket set (with ratchet and extension)
- C-clamp or brake caliper tool
- Jack and jack stands (or a hydraulic lift if available)
- Tire iron or lug wrench
- Brake cleaner spray
- Bungee cord or rope (to hang caliper)
- Flathead screwdriver
- Work gloves and safety goggles
- Anti-squeal brake lubricant
- Shop rags or paper towels
If you’re unsure about the brake pad size, check your Jeep’s owner manual or consult a parts store. Getting the wrong pads is a common beginner mistake.
Preparing Your Jeep Wrangler
Preparation is key for a smooth and safe brake pad replacement.
- Park on a flat surface. Use your parking brake and block the rear wheels to prevent rolling.
- Loosen lug nuts on the front wheels slightly—do not remove them yet.
- Raise the Jeep with a jack and secure it with jack stands. Never work under a car supported only by a jack.
- Remove the wheels completely and set them aside.
Take a moment to inspect the brake rotors and surrounding components for rust, cracks, or excessive wear. Rotors with deep grooves or blue marks may need replacement or resurfacing.
Removing The Old Brake Pads
Now you’re ready to take off the worn-out brake pads. This step requires patience and attention to detail.
- Locate the brake caliper. It sits over the brake rotor and is held by two bolts on the back.
- Remove the caliper bolts using a socket and ratchet. Set the bolts aside safely.
- Carefully slide the caliper off the rotor. Do not let it dangle by the brake hose—use a bungee cord or rope to hang it from the suspension.
- Remove the old brake pads. They slide out from the caliper bracket. Take note of their position and any clips or shims.
Non-obvious tip: Take a quick photo of the setup before removing anything. This will help you remember how to reinstall the new pads and hardware.
If the pads are stuck, use a flathead screwdriver to gently pry them out. Avoid scratching the rotor.
Inspecting And Preparing For New Pads
Before installing new brake pads, inspect everything:
- Brake rotors: If they’re smooth and free of deep grooves, they’re fine. If not, consider replacing or resurfacing.
- Caliper hardware: Clean clips and pins with brake cleaner. Replace if rusty or damaged.
- Brake caliper piston: Check for leaks or tears in the rubber boot.
Clean the area with brake cleaner and a rag. Dirt and grease can cause noise or uneven wear.
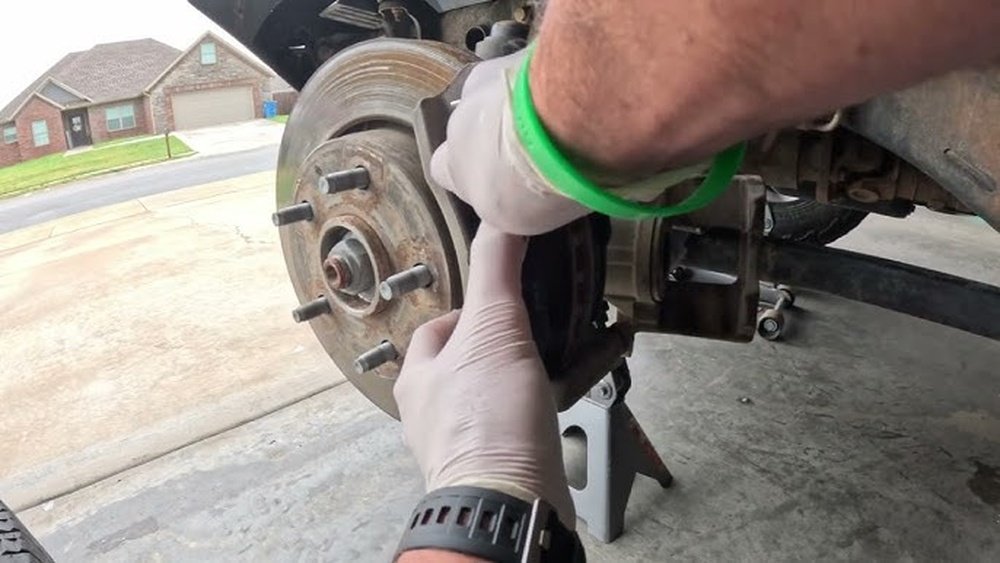
Pro tip: Many beginners forget to check the brake fluid reservoir. Open the cap slightly to let air escape—compressing the caliper piston can push fluid back into the system.

Credit: www.youtube.com
Installing The New Brake Pads
With everything clean and ready, you can now install the new brake pads:
- Apply anti-squeal lubricant to the back of the new pads (not the friction surface).
- Compress the caliper piston using a C-clamp or brake caliper tool. Place the old pad against the piston and slowly compress until it is flush with the caliper body.
- Insert the new pads into the caliper bracket in the same position as the old ones. Make sure any clips or shims are reused or replaced as needed.
- Reinstall the caliper over the new pads and rotor. Insert and tighten the caliper bolts (do not over-tighten).
Check that the caliper moves freely and nothing is pinched or misaligned.
Reattaching The Wheel And Final Steps
Now it’s time to finish up:
- Reinstall the wheel and hand-tighten the lug nuts.
- Lower the Jeep carefully from the jack stands.
- Torque the lug nuts to the manufacturer’s specifications (usually around 95-115 ft-lbs for a Wrangler).
- Pump the brake pedal several times before driving. This seats the pads against the rotor and restores brake pressure.
- Check the brake fluid level and top up if necessary.
First drive: Go for a slow test drive. Listen for any unusual noises. The brakes may feel slightly soft at first—this is normal and should firm up quickly.
Front Vs Rear Brake Pad Replacement
Changing front and rear brake pads on a Jeep Wrangler is similar, but there are a few key differences. Here’s a quick comparison:
| Feature | Front Brake Pads | Rear Brake Pads |
|---|---|---|
| Wear Rate | Faster (do most braking) | Slower |
| Pad Size | Larger | Smaller |
| Caliper Type | Usually floating | Floating or drum (older models) |
| Replacement Frequency | Every 30,000-50,000 miles | Every 50,000-70,000 miles |
Tip: Rear brakes on older Wranglers may use drums instead of discs. The replacement procedure is different for drum brakes.
How To Choose The Right Brake Pads
Picking the best brake pads for your Jeep Wrangler depends on your driving style and needs. Here’s a side-by-side comparison of popular types:
| Brake Pad Type | Pros | Cons | Best For |
|---|---|---|---|
| Ceramic | Quiet, low dust, long life | More expensive | Daily driving, light off-road |
| Semi-metallic | Great stopping power, affordable | Noisier, more dust | Heavy use, towing |
| Organic | Soft, quiet, budget-friendly | Shorter life, fades under heat | Light driving, classic Jeeps |
Non-obvious insight: Off-road drivers may prefer semi-metallic pads for better grip in muddy or wet conditions.
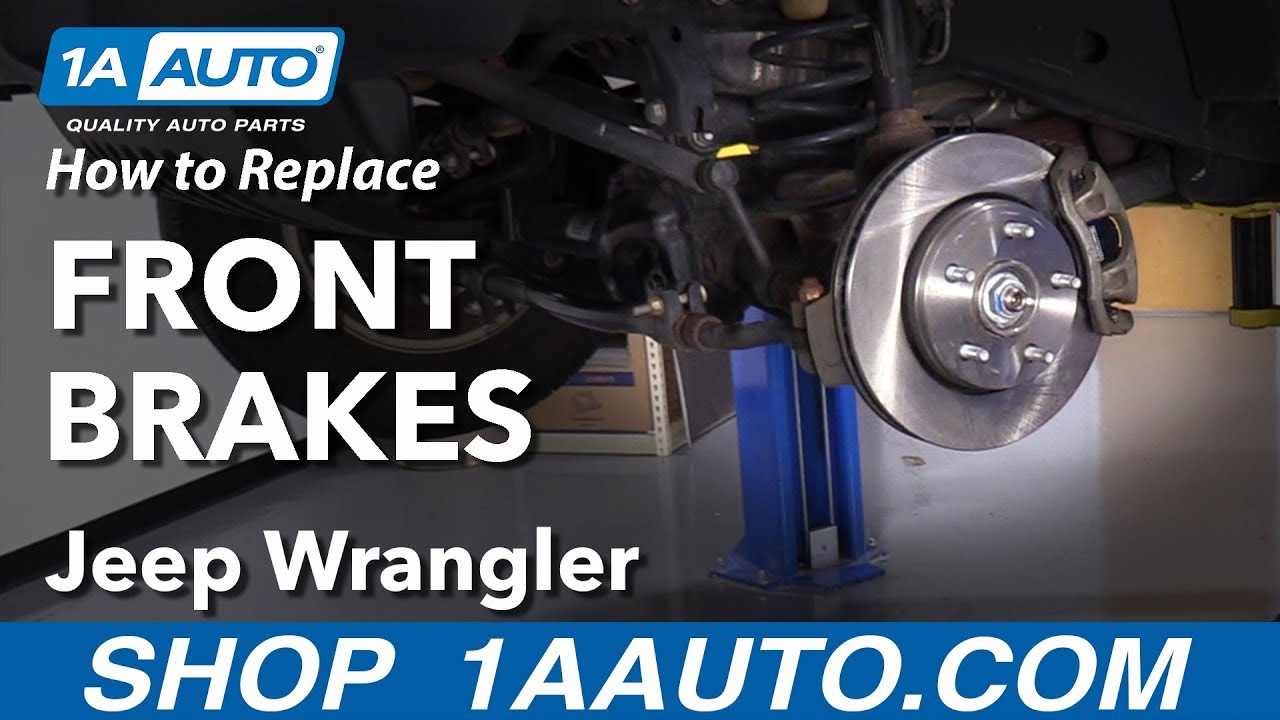
Credit: www.1aauto.com
Common Mistakes To Avoid
Even experienced DIYers make mistakes when replacing brake pads. Here are some to watch out for:
- Not cleaning hardware: Dirt or rust on clips and pins can cause brake noise and uneven wear.
- Forgetting to pump the brake pedal: This can result in a “soft” pedal and delayed braking.
- Touching friction surface: Oils from your skin can cause squeaking or reduce stopping power.
- Ignoring rotor condition: Worn rotors can ruin new pads quickly.
- Mixing old and new pads: Always replace both sides (left and right) at the same time for even braking.
Extra tip: Don’t reuse old caliper bolts if they are stretched or damaged. This can lead to brake failure.
How Often Should You Change Jeep Wrangler Brake Pads?
How often you change your brake pads depends on driving habits, terrain, and pad type. On average:
- Front brake pads: 30,000 to 50,000 miles
- Rear brake pads: 50,000 to 70,000 miles
If you drive in mountains, tow heavy loads, or go off-road, you might need to replace them sooner. Listen for squealing, grinding, or longer stopping distances.
Credit: www.wayalife.com
Cost Of Replacing Brake Pads
Doing the work yourself saves a lot compared to going to a shop. Here’s a rough cost breakdown:
| Item | DIY Cost | Shop Cost |
|---|---|---|
| Brake Pads (front set) | $40 – $100 | Included |
| Labor | $0 | $120 – $200 |
| Tools (if needed) | $50 – $100 (one-time) | Included |
| Total (per axle) | $40 – $200 | $160 – $300 |
Non-obvious tip: Investing in tools pays off if you plan to do your own maintenance in the future.
Safety Tips For Diy Brake Pad Replacement
Safety should always come first. Here are some simple but important reminders:
- Always use jack stands—never rely on a jack alone.
- Wear gloves and goggles to protect your hands and eyes from dust and chemicals.
- Double-check all bolts are tight before you finish.
- Test your brakes at low speed before normal driving.
- Dispose of old pads and chemicals properly; many auto stores recycle them for free.
When To Call A Professional
While many Jeep Wrangler owners can change brake pads themselves, sometimes it’s better to call a mechanic. Get help if:
- You notice leaks, broken parts, or damaged brake lines.
- The caliper piston won’t compress easily.
- The rotor is deeply scored or cracked.
- You feel unsure at any step.
- The brake warning light stays on after replacement.
Remember, your brakes are the most important safety system on your Jeep. It’s okay to ask for help if you need it.
For more detailed specifications or troubleshooting, you can always check the official Jeep Wrangler Wikipedia.
Frequently Asked Questions
How Do I Know When My Jeep Wrangler Needs New Brake Pads?
Listen for squealing or grinding noises when braking. You may also notice the vehicle takes longer to stop or the brake warning light turns on. Check the pad thickness through the wheel—if it’s less than 1/4 inch, it’s time to replace.
What Type Of Brake Pads Are Best For Off-roading?
Semi-metallic brake pads are often recommended for off-roading. They handle heat well, provide strong stopping power, and resist wear from mud and water better than organic or ceramic pads.
Can I Replace Just One Set Of Brake Pads, Or Do I Need To Do Both Sides?
Always replace brake pads in pairs—both left and right sides of the same axle. This ensures balanced braking and prevents the Jeep from pulling to one side.
Is It Necessary To Replace Rotors With The Brake Pads?
Not always. If your rotors are smooth and not warped, you can keep using them. However, if there are deep grooves, scoring, or warping, it’s best to replace or resurface them when changing pads.
How Long Does It Take To Replace Brake Pads On A Jeep Wrangler?
For most DIYers, it takes about 1 to 2 hours to replace brake pads on both wheels of one axle. The first time may take longer, but with practice, you’ll get faster.
Replacing your Jeep Wrangler brake pads is a satisfying and practical job for any owner. With the right tools, clear steps, and a bit of care, you’ll keep your Jeep safe and reliable for years to come.