If you own a Jeep JK, you know how important it is to protect your rig when hitting rough trails. Belly skids are a must-have upgrade that can save your Jeep’s undercarriage from rocks, debris, and tough terrain.
But how do you install them correctly? This guide will walk you through every step, making the process simple and stress-free. By the end, you’ll have the confidence to add this essential gear yourself, keeping your Jeep safe and ready for any adventure.
Keep reading to learn exactly how to install belly skids on your Jeep JK—and never worry about underbody damage again.
Tools And Materials Needed
Installing belly skids on a Jeep JK requires the right tools and materials. These help make the process smooth and safe. Having everything ready saves time and avoids frustration.
Below is a list of essential tools and materials needed for the installation. Each item plays a key role in securing the belly skid properly.
Basic Hand Tools
A set of basic hand tools is necessary. This includes a ratchet, socket set, and wrenches. These help remove and tighten bolts during installation. A screwdriver may also be needed for small fasteners.
Jack And Jack Stands
Use a jack to lift the Jeep safely. Jack stands hold the vehicle securely while you work underneath. Never rely only on the jack for support.
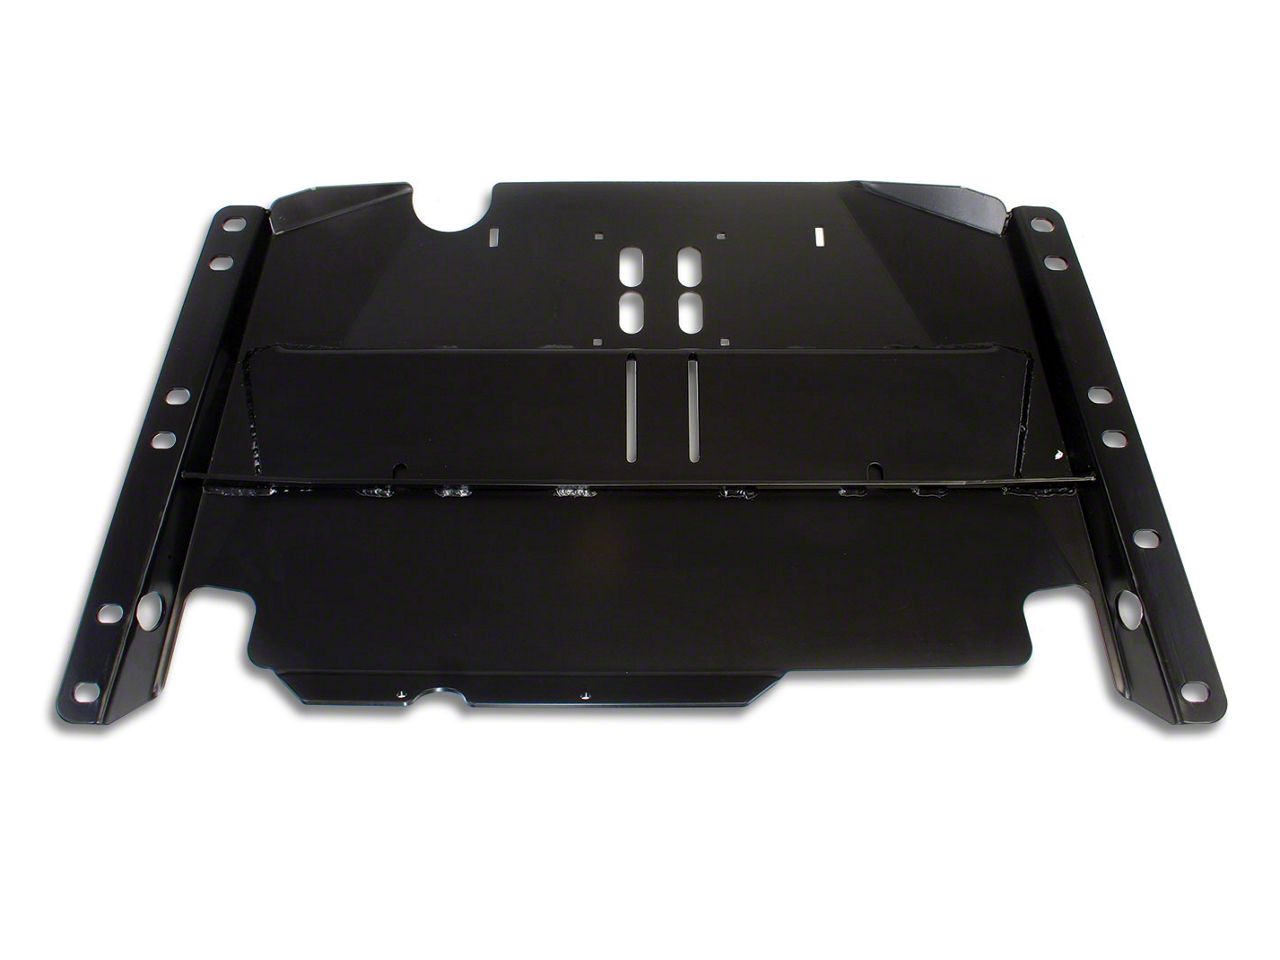
Belly Skid Kit
The belly skid kit usually contains the skid plate and mounting hardware. Check the kit for bolts, nuts, and brackets. Make sure all parts are included before starting.
Protective Gear
Wear gloves to protect your hands from sharp edges. Safety glasses shield your eyes from dirt and debris. These small precautions prevent injuries.
Torque Wrench
A torque wrench ensures bolts are tightened to the correct specification. This prevents damage and keeps the skid plate secure. Follow the manufacturer’s torque settings closely.
Credit: www.extremeterrain.com
Preparing Your Jeep Jk
Preparing your Jeep JK properly is the first step to install belly skids safely. This preparation ensures a smooth, damage-free installation. Taking time to prepare helps avoid mistakes and saves time later. Follow these simple steps to get your Jeep ready for the new skids.
Cleaning The Installation Area
Start by cleaning the area where you will install the belly skids. Dirt, mud, and grease can prevent the skids from fitting properly. Use a brush and water to remove loose dirt. Then, wipe the surface with a clean cloth. Make sure the metal parts are dry before moving on. A clean area improves the skid’s grip and protects your Jeep’s frame.
Lifting And Securing The Vehicle
Next, lift your Jeep JK to access the underside easily. Use a reliable jack and jack stands for safety. Place the jack under the frame and lift the vehicle slowly. Secure it with jack stands on both sides. Never rely on the jack alone. Double-check that the Jeep is stable before working underneath. Proper lifting keeps you safe and makes installation easier.
Locating Mounting Points
Locating mounting points is the first step in installing belly skids on your Jeep JK. These points are the spots where you will attach the skids securely. Finding the right places ensures the skids fit well and protect your vehicle effectively.
Each Jeep JK model may have slightly different mounting points. Knowing their exact location saves time and prevents mistakes during installation. It also helps keep the belly skids stable during off-road driving.
Identifying Factory Mounting Holes
Start by checking under your Jeep for factory mounting holes. These holes are usually near the frame rails. They are designed for attaching skid plates or other protective parts.
Use a flashlight to see clearly in dark areas. Look for clean, round holes without rust or damage. These holes often have bolts or plugs that you can remove.
Checking Frame Rails For Brackets
Frame rails run along the sides of the Jeep’s underside. Inspect them carefully for any brackets or weld points. These brackets may serve as mounting spots for belly skids.
Feel for solid metal areas that do not bend or flex. These areas can hold the weight of the skid plates firmly. Avoid thin or rusted spots.
Using Vehicle Manual For Reference
Consult your Jeep JK’s manual for mounting point diagrams. The manual shows exact locations with measurements. Follow these guides to locate mounting spots fast.
Keep the manual nearby during installation. It helps verify that you are using the right holes and brackets. This reduces chances of errors or damage.
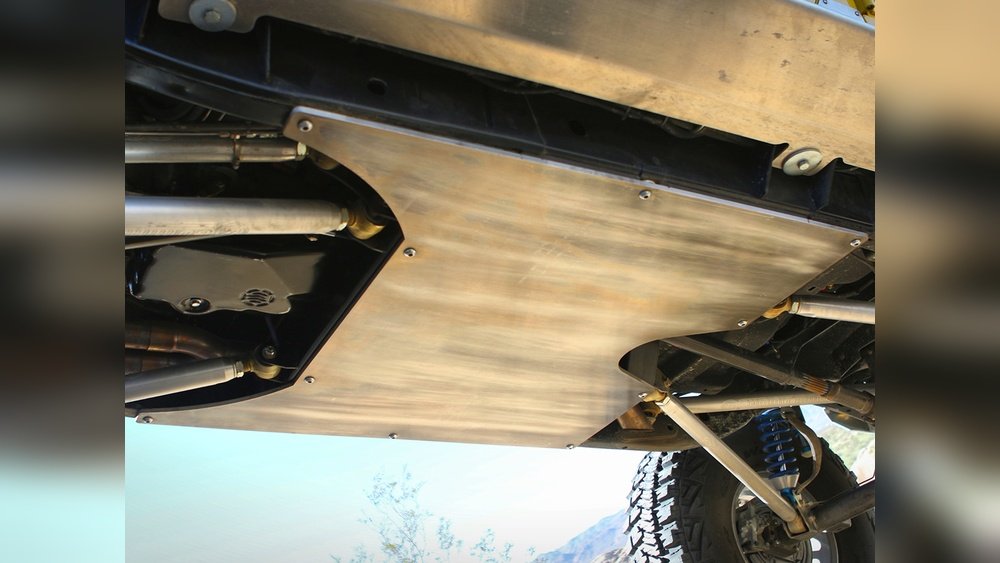
Credit: genright.com
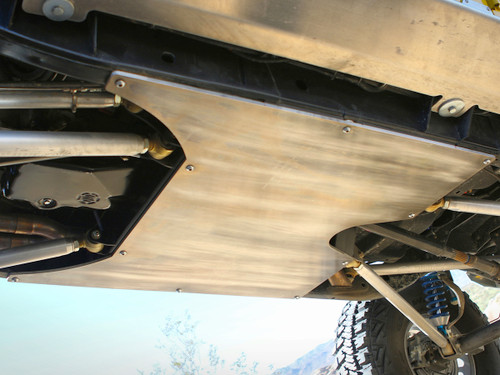
Attaching The Belly Skids
Attaching the belly skids on your Jeep JK is a key step in protecting its undercarriage. Proper installation helps shield vital parts during off-road drives. This section guides you through aligning and securing the skids correctly.
Aligning The Skids
Place the belly skid under the Jeep carefully. Check that the skid fits with the frame holes. Adjust the skid so all mounting points line up. Use a friend to hold the skid steady. This makes attaching bolts easier and safer.
Securing With Bolts And Hardware
Insert bolts into the aligned holes on the skid and frame. Tighten bolts by hand first to keep parts in place. Use a wrench to secure bolts firmly. Avoid over-tightening to prevent damage. Double-check that all bolts and hardware are tight and secure. This ensures the skid stays fixed during rough rides.
Checking The Installation
Checking the installation of belly skids on your Jeep JK is important. It ensures the skids are secure and will protect your vehicle during off-road trips. A proper check avoids damage and keeps you safe on rough trails.
Take your time to review the work. Look for any loose parts or areas that might need adjustment. This step helps catch mistakes before hitting the trail.
Tightening Bolts
Start by tightening all bolts evenly. Use a wrench or socket that fits well. Tighten bolts in a crisscross pattern to spread pressure. Avoid overtightening, which can strip threads or break bolts.
Check each bolt twice. Make sure none are loose or missing. Tight bolts keep the belly skid stable and strong.
Testing For Stability
After tightening, test the belly skid for stability. Push and shake it gently with your hands. It should feel solid and not move.
Drive your Jeep slowly over a flat surface. Listen for noises or rattles under the vehicle. If you hear anything, stop and check the bolts again.
Ensure the skid does not touch other parts except the frame. Proper fit helps protect your Jeep and avoids damage.

Credit: www.youtube.com
Maintenance Tips For Belly Skids
Belly skids protect the underside of your Jeep JK from rocks and rough terrain. Maintaining them keeps your vehicle safe and ready for every trail. Simple care steps help the skids last longer and work better.
Check your belly skids often. Look for dents, cracks, or loose bolts. Fix problems quickly to avoid bigger damage. Clean the skids after every off-road trip to remove dirt and mud.
Inspect For Damage Regularly
Look under your Jeep for dents or cracks on the belly skids. Tighten bolts that may have loosened. Replace parts that show heavy wear or bending. Early fixes prevent costly repairs later.
Clean After Off-road Trips
Use water and a brush to remove mud and debris. Dry the skids well to stop rust from forming. Avoid harsh chemicals that might damage the skid’s finish.
Apply Protective Coatings
Use rust-resistant spray or paint on the skids. This adds a layer of protection from moisture and dirt. Reapply coatings every few months to keep the skids strong.
Check Mounting Hardware
Tighten all bolts and nuts securely. Replace rusty or worn hardware to keep the skids stable. Loose mounts can cause rattling and reduce protection.
Frequently Asked Questions
What Tools Are Needed To Install Jeep Jk Belly Skids?
You need a socket wrench, torque wrench, jack stands, and screwdrivers. These tools help safely remove and secure skid plates on your Jeep JK.
How Long Does It Take To Install Belly Skids On A Jeep Jk?
Installation usually takes 1 to 2 hours. Time depends on your experience and the skid plate design.
Can I Install Belly Skids Without Professional Help?
Yes, with basic mechanical skills and proper tools, you can install them yourself. Follow instructions carefully for safety.
Do Belly Skids Protect Jeep Jk’s Undercarriage Effectively?
Yes, belly skids shield vital parts from rocks and debris. They prevent damage during off-road driving.
Conclusion
Installing belly skids on your Jeep JK protects its undercarriage well. The process is straightforward and saves costly repairs later. Use the right tools and follow each step carefully. Tighten all bolts securely for safety and durability. Check your work before hitting rough trails.
Enjoy driving with more confidence and less worry about damage. Regularly inspect the skids to keep them effective. This simple upgrade adds value and peace of mind to your Jeep adventures.