Are you looking to add a backup camera screen to your Jeep JL but don’t know where to start? Installing this handy feature can make parking and reversing much safer and easier for you.
In this guide, you’ll find simple, step-by-step instructions that anyone can follow, even if you’re not a tech expert. By the end, you’ll have your backup camera screen up and running, giving you a clearer view behind your Jeep every time you drive.
Keep reading—you’re just a few easy steps away from boosting your safety and confidence on the road.
Credit: prolificaudio.com
Choosing The Right Backup Camera Screen
Choosing the right backup camera screen for your Jeep JL is important. The screen shows the camera view clearly, helping you park safely. Picking the correct screen improves your driving experience and adds convenience.
Several factors affect your choice. Size, type, and extra features all matter. Your Jeep JL also needs a screen that fits well and works properly.
Screen Types And Sizes
Backup camera screens come in many types. Some are built into the dashboard. Others are small, attachable monitors. The size of the screen affects how easy it is to see.
Choose a screen size that fits your dashboard space. Too small, and it is hard to view. Too big, and it may block controls or look odd.
Compatibility With Jeep Jl
Your screen must work with your Jeep JL’s system. Some screens connect directly to the factory wiring. Others need extra adapters or wiring changes.
Check if the screen supports Jeep JL’s software and power needs. Confirm it fits the dashboard or mounting spots without issues.
Additional Features To Consider
Extra features add value and ease of use. Some screens have brightness control for day and night driving. Others offer touch controls or split-screen views.
Look for waterproof or dustproof options for durability. Some screens include parking guides to help judge distance better.
Gathering Necessary Tools And Materials
Before starting the installation of a backup camera screen in your Jeep JL, gathering the right tools and materials is crucial. This step ensures a smooth and efficient process. Having everything ready helps avoid interruptions and delays.
Organizing your workspace with all necessary items improves focus. It also reduces the risk of mistakes during installation. Prepare a clean, well-lit area to work comfortably and safely.
Essential Tools List
- Phillips and flathead screwdrivers
- Wire strippers and cutters
- Electrical tape
- Multimeter for testing connections
- Panel removal tools
- Drill with bits (if needed)
- Zip ties for cable management
- Socket wrench set
Backup Camera Screen Kit Components
- Backup camera screen display unit
- Camera with mounting bracket
- Wiring harness
- Power cables and connectors
- Instruction manual
- Mounting screws and hardware
Preparing The Jeep Jl For Installation
Preparing your Jeep JL for a backup camera screen installation is a key first step. This preparation ensures a smooth and safe process. Proper preparation reduces the risk of damage to the vehicle’s electrical system. It also saves time during installation. Follow these simple steps to get your Jeep ready.
Locating The Existing Wiring
Start by finding the existing wiring for the backup camera. Usually, the wiring runs near the rear license plate or tailgate area. Check behind the interior panels close to the rear of the Jeep. Use a flashlight to spot wires connected to the current camera or sensor system. Carefully trace these wires towards the dashboard area. This helps in connecting the new screen without cutting or damaging wires.
Disconnecting The Battery
Before touching any wires, disconnect the Jeep’s battery. This step prevents short circuits and electrical shocks. Use a wrench to remove the negative battery terminal first. Then, remove the positive terminal. Keep the battery disconnected while working on the installation. Reconnect the battery only after completing all wiring tasks. This ensures your safety and protects the vehicle’s electronics.
Mounting The Backup Camera Screen
Mounting the backup camera screen in your Jeep JL is a key step for clear visibility. It ensures the screen is easy to see and use while driving. Proper mounting keeps the screen stable and safe during rides.
Selecting The Ideal Screen Location
Choose a place where the screen does not block your view of the road. The dashboard or near the rearview mirror works well. Make sure the screen is within easy reach. It should not distract you while driving.
Installing The Screen Bracket
Use the bracket that comes with your backup camera kit. Attach the bracket firmly to the chosen spot. Check the fit to avoid any movement. Use screws or adhesive pads as needed for strong support.
Securing The Screen
Place the screen onto the bracket carefully. Lock it in place by tightening screws or clips. Test the screen’s stability by gently shaking it. Ensure it stays fixed and does not wobble during driving.
Wiring The Backup Camera Screen
Wiring the backup camera screen in your Jeep JL is a key step. It lets you see behind your vehicle safely and clearly. Proper wiring ensures the camera works without issues. This guide breaks down the process into simple steps.
Connecting Power And Ground Wires
Start by identifying the power source for the screen. Use the vehicle’s fuse box or an accessory power wire. Connect the red wire from the screen to the power source. Then, attach the black wire to a solid ground point on the Jeep. Secure all connections tightly to avoid loose contacts.
Routing The Video Cable
Next, route the video cable from the camera to the screen. Hide the cable along the Jeep’s interior panels. Avoid sharp edges and moving parts that can damage the cable. Use zip ties to keep the cable in place. Leave some slack near connections to prevent strain.
Integrating With Factory Wiring
Match the backup camera system with the Jeep’s factory wiring. Locate the reverse light wire, as it triggers the camera. Connect the camera’s trigger wire to the reverse light wire. Use a wire tap or splice connector for a clean join. Test the system to confirm the screen activates in reverse.

Credit: www.amazon.com
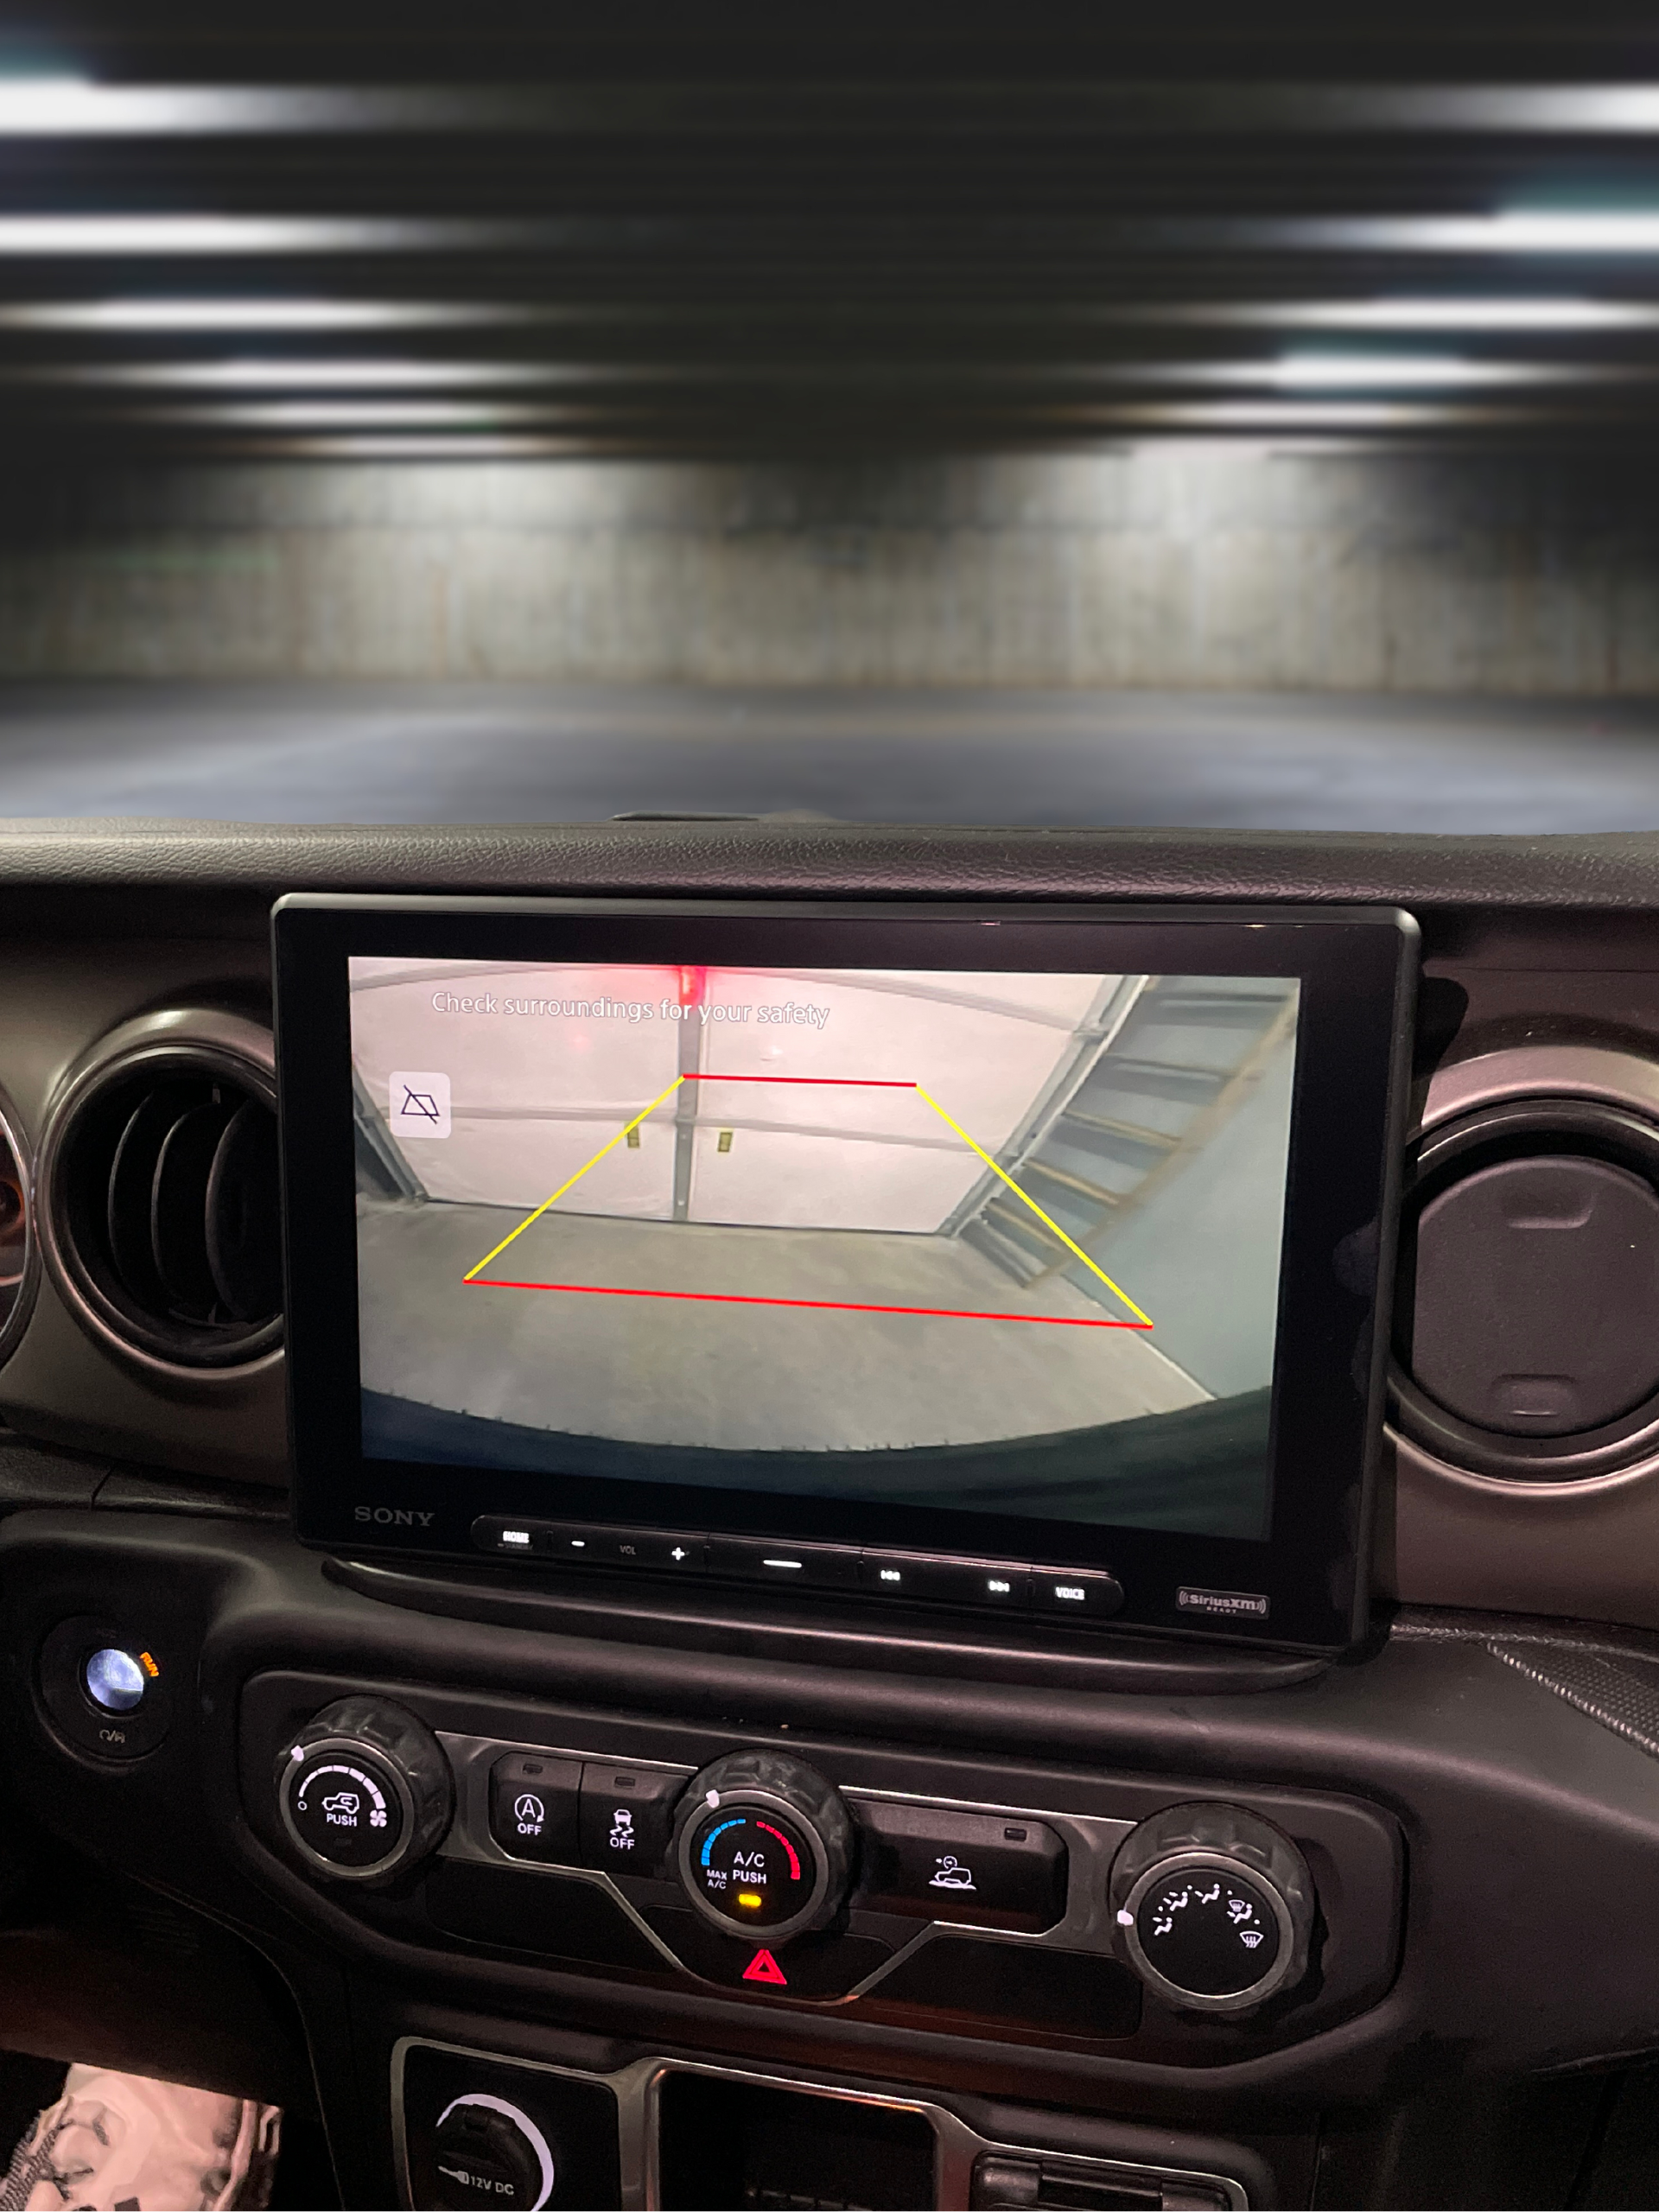
Testing The Backup Camera Screen
Testing the backup camera screen is a crucial step after installation. This ensures the system works correctly and safely. Proper testing helps identify problems early. It also guarantees a clear view while reversing your Jeep JL.
Powering On And Display Check
Turn on your Jeep’s ignition to power the screen. The backup camera display should activate automatically in reverse gear. Check if the screen shows a clear image without flickers. Confirm the colors and brightness look natural. Any black screen or static means a connection issue.
Camera Angle Adjustment
Adjust the camera angle for the best rear view. The camera should cover the widest area behind your Jeep. Avoid pointing too low or too high. A good angle shows the ground and any obstacles clearly. Tighten the camera mount after adjustment to keep it stable.
Troubleshooting Common Issues
Check all cable connections if the screen is blank or blurry. Clean the camera lens to remove dirt or water spots. Reset the system by turning the ignition off and on. If the image is reversed, adjust the mirror settings in the display menu. Persistent problems may need professional help.
Tips For Maintenance And Longevity
Keeping your backup camera screen in good shape helps it last longer. Regular care prevents damage and keeps the image clear. Small efforts make a big difference in performance and safety.
Follow simple maintenance tips to protect your Jeep JL’s backup camera screen. These tips help avoid common problems and keep your screen working well.
Cleaning The Screen
Use a soft, dry cloth to clean the screen. Avoid harsh chemicals or abrasive materials. Gently wipe the screen to remove dust and fingerprints. Clean it regularly to keep the view clear. A clean screen helps you see obstacles better.
Protecting Wiring From Damage
Check the wiring for cuts or wear often. Secure loose wires with clips or ties. Avoid pulling or bending wires sharply. Keep wires away from heat and moving parts. Proper wiring prevents connection problems and screen failure.

Credit: www.amazon.com
Frequently Asked Questions
How Do I Install A Backup Camera Screen On Jeep Jl?
To install a backup camera screen on Jeep JL, first disconnect the battery. Then, mount the screen, connect power and video cables, and test the system. Follow the manufacturer’s instructions carefully for secure installation and optimal performance.
What Tools Are Needed To Install Jeep Jl Backup Camera?
You will need screwdrivers, wire strippers, electrical tape, a drill, and possibly trim removal tools. These help in mounting the screen, connecting wires, and securing the camera without damaging your Jeep.
Can I Install A Backup Camera Screen Myself On Jeep Jl?
Yes, if you have basic automotive and electrical skills, you can install it yourself. Follow step-by-step guides and safety precautions to ensure proper installation and avoid damage.
Where Should The Backup Camera Screen Be Mounted In Jeep Jl?
The backup camera screen is typically mounted on or near the dashboard or rearview mirror. Choose a location with clear visibility and easy access without obstructing your driving view.
Conclusion
Installing a backup camera screen on your Jeep JL improves safety and convenience. Follow the steps carefully for the best results. Take your time to connect wires and secure the screen properly. Test the camera before driving to ensure it works well.
This simple upgrade helps you see better while reversing. Enjoy clearer views and safer parking every time. Keep your Jeep updated with easy, useful additions like this one.